Natural Dyeing – a Novel way to research

phpCJcHUjAM.jpg Small
Dried natural dye plant material

Well, when you SAY it as opposed to READ it it does cause confusion (and a little consternation if not concern) however, this is all soon put right when I explain  (waving hands about) that I mean dyeing – with COLOURS from natural plants.

A good friend of mine runs workshops from her beautifully converted small barn at Nine Acres near Callington, Cornwall. Workshops on all sorts of crafts. This one was on DYEING USING NATURAL PLANTS .

phpUR8YMgAM-1.jpg sm
Preparing the Weld
phpMVlMujAM.jpg s
The colour begins to come out – looking a bit green at this stage

So on  a chilly morning we met and after a welcoming cuppa went out into the garden to see some of these plants in their natural state. Now, as this was early winter most were as as stalks of dried out flower stems, or low growing base leaves, but it gave us the idea about the ones that were native or could be grown easily in the UK

Back in the barn we were shown a range of plant material we could work with, some harvested from Jane’s garden, some bought in, some native, some not.

There were eight of us and four work-stations and it was suggested we pair up and each pair work on a different dye in the morning, and yet a different one in the afternoon. Some people had come together, easy pairing. I was there for a very specific reason.

Jane had been to our WI and demonstrated dyeing using Woad, a native plant, and I wanted to know about dyeing using other native plants.

phpykD9kGAM.jpg s
The resultant colour from using dried Weld plant


I said ‘I want to dye with WELD,’ and immediately another guest said, ‘yes, me too!’ This is how Sally and I started working together.

As we gathered the ingredients together I confessed I wasn’t so much interested in dyeing for the product – but that I was researching for a book I want to write one day. Her response was ‘Me too. I’m researching for a book.’

RESEARCH

We worked on the WELD, producing a yellow dye which we then coloured some prepared sheep-wool with. As we worked so I learned of her Trilogy about the real historical figure, Caradoc, set in AD 25 onwards and I told her of my idea to write the legend (that doesn’t exist) to explain the naming of our church after an obscure Irish nun from the late 600s.  Both of us wanting to absorb the sights and smells that may permeate the backgrounds of our stories.
phpKrZeqvAM.jpg s
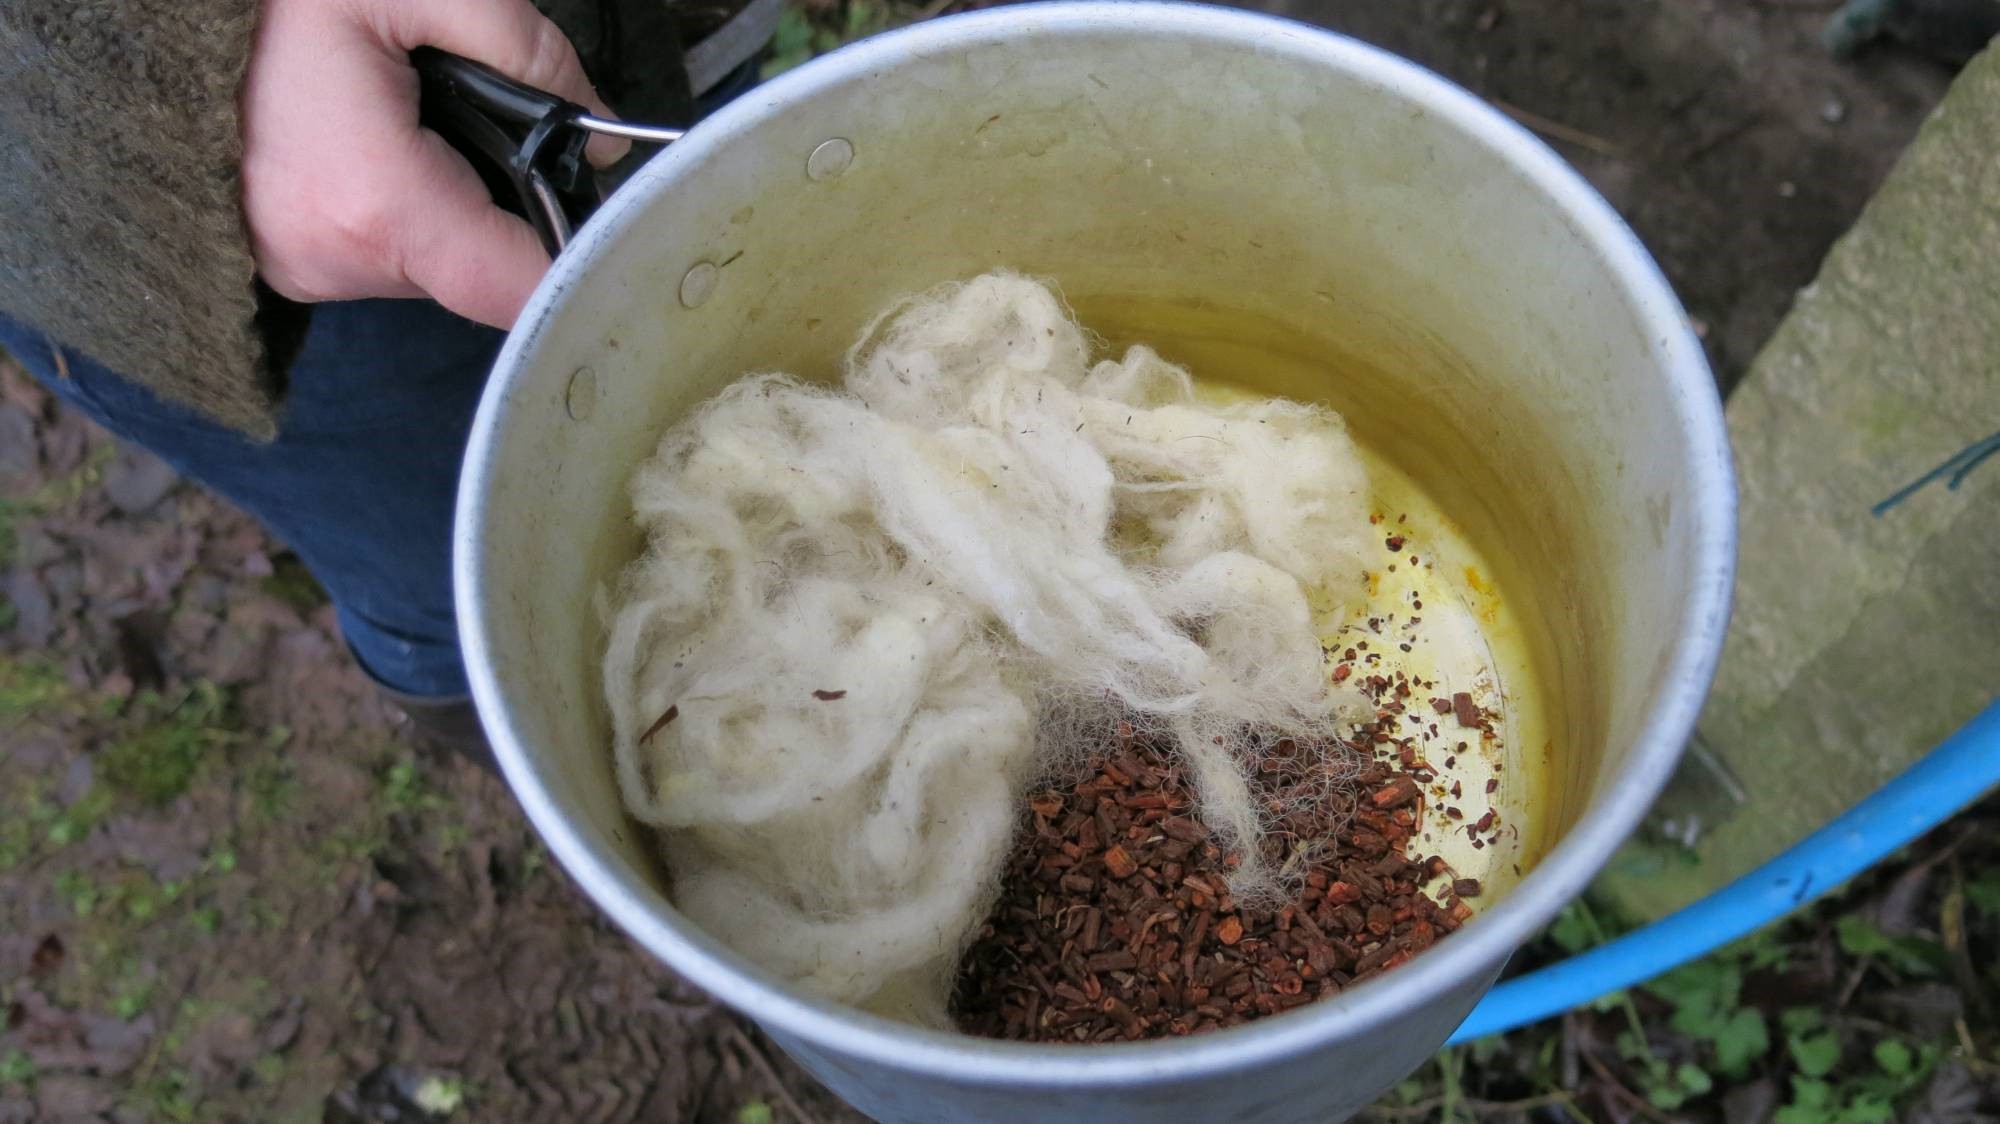
Dried Madder roots pieces put in together with the wool (before adding water)
php1eJsEyAM.jpg s
Picking out Madder roots bits from the dyed wool

Now when it comes to researching for novels it can often be done at a remove. You can find many things out now with a carefully worded internet search request and a few clicks of the button. I have also ‘flown’ myself to different parts of the world when researching as I mentioned  here  in another blog – where I wanted my main character Luke Adamson in  The Angel Bug to travel to a prison facility in the USA.

Then you can ‘pick the brains’ of people you know (policemen / doctors / engineers /whatever) for the bits that research cannot really tell you  – sounds, smells, pain-levels, consequences etc.

You can also ‘extrapolate’ from your own experiences. You take the feeling / physical experience from say, the scary experience when some idiot was overtaking and caused a near-miss situation … and develop that snap-shot gut-twist  into the feeling that your character has in a near-death situation.

phpHEe4K1AM.jpg s
From top Weld, Madder and Weld mix) Madder (un-soaked – so pale) and Woad (winter leaves so pale)

And then you can do some first hand work and absorb these sights, textures and smells yourself.

In the afternoon we worked with the third native natural dye – Madder, though the dried root we used was un-soaked, so did not give the deep ‘Beef-Eater Uniform’ red it should. The scent of under-simmering madder (you mustn’t let it boil) seemed sweet in comparison to the ‘cabbage smell’ of the weld, especially noticeable as we compared them directly.  Then at a whim we mixed the remaining Weld Dye with the left-over Madder liquid to produce a pleasant peachy colour.

I hope you’ve enjoyed this little peek at Authors researching and the world of workshop experiences. I am happy to say that Sally’s trilogy will be published by my partnership publisher (Pendown Publishing) so we’ll get to see more of each other as our books go out together into the market.

Do you enjoy going on workshops?

What is the best thing you have ever done on one?

Do share, you know I love to hear from you.

Big this- Big that – But Bringing people together

I’d love to tell you about the great atmosphere, the laughter, the absolutely yummy food that was to be had at our village Big Breakfast last Saturday first-hand … but as I spent from half past nine to half past twelve cooking eggs and mushrooms non-stop, without time to even look up, I can only report second-hand on most of it.

Please imagine here a large plate, filled up with two rashers of bacon, two sausages, an egg,  then add mushrooms, tomatoes and baked beans, to the side have a plate of toast and marmalade and a cup of tea – got that? Good – because I didn’t have time to take a photograph – despite remembering to take my camera!

It is true I could hear the buzz roar of convivial chatter and the laughter, and hear the diners who stuck their heads in the hatch to congratulate us on the tastiness of the food, and, when everyone was gone and we had a chance to eat, I could testify to that too. It was wonderful! However I can only remember one time when we were busier, and that time taught us a lesson in table management!

‘What is this Big Breakfast?’  You might ask, especially if you are not even from the UK (as I know some of you aren’t) or indeed, live in an urban environment where this feast has not caught on … yet.

Each year there is a National Big Breakfast week. Consisting of the traditional English Breakfast. This is partly to raise awareness of good quality British produced foods – bacon, sausages, eggs, mushrooms and more – and to raise money for whichever group are running it – traditionally here it has been the WI and Parish Hall funds

DSCF5184
Hedgerows of daffodils without litter!

Then in March we have our Big Tidy – which is a parish-wide litter pick of the highways and byways before our beautiful parish bursts into bloom with hedgerows decorated by daffodils and wild flowers. Again organised by us in the WI but participated in by anyone who likes to get involved.

The result is a HUGE (wish I could make the fonts go bigger on this blog) pile of bags of collected litter – and a really warm feeling of achievement! (though perhaps I should DSCF6776 cropwarn of the side-effect: of being able to spot the tiniest piece of litter at a hundred paces that doesn’t wear off for weeks!)

In reality both these are little events in the world scheme of things … but these little things make a difference – they bring people together, help build community, share in everyday things, feel good about their environment.

Big This – Big That – but these little things DO make a difference. Community, shared environment, shared lives.

What events are run in your area that bring people together?

Who is it that organises them?

Did you come along to the Big Breakfast? Are you going to join in the Big Tidy?

Do share – you know I love to hear from you.

Bargain! BARGAIN!! – Or is it?

BOOK BARGAINThis special offer (absolutely genuine by the way – my photo taken on actual book cover) is not a bargain – obviously. However, not all fake  ‘bargains’ are as easy to spot. Many do not even scream ‘bargain’ at you. They just offer themselves in a way that we have been trained to assume is a ‘bargain’. Even this blatantly wrong bargain sticker would still draw the customer to look at the goods

Come on woman! I hear you say – what are you getting at?

Well, I am an inveterate checker of  ‘price per 100g / kilo’ at the supermarket, if I weren’t I would have frequently paid over the odds per weight by going automatically for the ‘multi-pack’ or the larger size – but it isn’t always the cheapest option! [And getting duped into paying more than I need, annoys me!]

‘Take care of the pennies and the pounds will take care of themselves’

Recently I have noticed ‘Family Value packs of Carrots’ at 6p/kg over loose carrots. Large packs of mushrooms marked ‘special’ at 15p /kg over loose mushrooms and broccoli (or calabrese) vacuum-sealed in plastic, also at a reduced price, that was still more than the loose per kg.

Away from the fresh produce and onto the packed goods: Multi-packs of fruit-juice, that you might reach for, suddenly 80p over the price of the individual ones – when they have a special on singles but not the multi-packs. Specials on small boxes of cereal / tea that make them cheaper per 100grams than the large boxes of the same, again, by having reductions on one size only. If the goods inside the package are being reduced – then be honest with it and reduce them across the range!

I have no problem with the supermarkets putting down the prices of the smaller packs – indeed I often feel that those who have to buy small-and-often due to finances or usage or space difficulties ought not be over-penalised for their need to buy smaller. (Whilst taking into account that packaging for small quantities probably costs almost as much as packaging for large – yet is frequently disproportionally charged for)

The question is – who is it that are being targeted by the supermarkets when they flag-up these ‘spurious’ special offers?

OK, so you might say it is those with an eye to a bargain, but you can look at  it another way, they may be someone who needs to watch their pennies.

However, if you combine that with someone who lacks the time, or the peace and quiet, to read the price per 100g / kg and compare – the ‘special price!!’ ‘Family value!!‘ ‘multi-pack!!‘ ‘larger box!!‘ – is mainly going to catch the harassed shopper for the family.

Someone squeezing in the shopping after work and before getting an evening meal together. Someone with children in tow. Someone who cannot spend too much time shopping as they have dependants to care for. Someone who has to get the shopping and be back to the bus-stop before the bus leaves*. (*Rural readers will understand this more than urban)

 ‘Don’t be penny wise and pound foolish’

There are other costs to consider when you head off  to shop at the supermarket too. Unless you are highly organised, or live within walking distance of the big supermarket, the trip to get something you need, but forgot, can cost you dear. Unless your one trip into town makes sure you really have everything –  when you nip back a couple of days later for the item you forgot you will  be paying well over the odds – fuel prices being what they are!

How useful, how nice if you could just pop along to the corner / village shop and pick it up there?  Well, you can if the little shop is still open, and to keep the little shop open we all need to make sure we do SOME of our weekly shop there, every week.  They can’t be expected to stock the esoteric and exotic (as everything has a use-by date now-a-days) but they usually have all the basics and staples that most of us buy on a regular basis anyway, and can supply other things if there are regular firm orders for them.

Do you know where my best bargains were to be found last week? In my local post-office stores! There, two of the items I buy every week were on special offer. Real special offers. Orange juice at two boxes for £2 (where they are usually £1.19  each) and sliced pineapple (to go with the delicious Cornish Bacon Company gammon I buy there too) at 2 cans for £1 instead of 62p each, plus I didn’t have to drive into town and back to get them (average fuel cost: 6miles = £1.00) and shopping locally helps to keep our local shop going and our village community alive – making it worthwhile even if I hadn’t saved extra. Win – Win! Much better than just doing the supermarkets!

Well, what do you think?

Where do you live? Do you have a local shop?

Do you love or loathe the supermarket ‘bargains’?

Do share – you know I love to hear from you 🙂

P.S.  It is one of our WI campaigns too – shop local!

Too Late to Decorate a Christmas Cake??

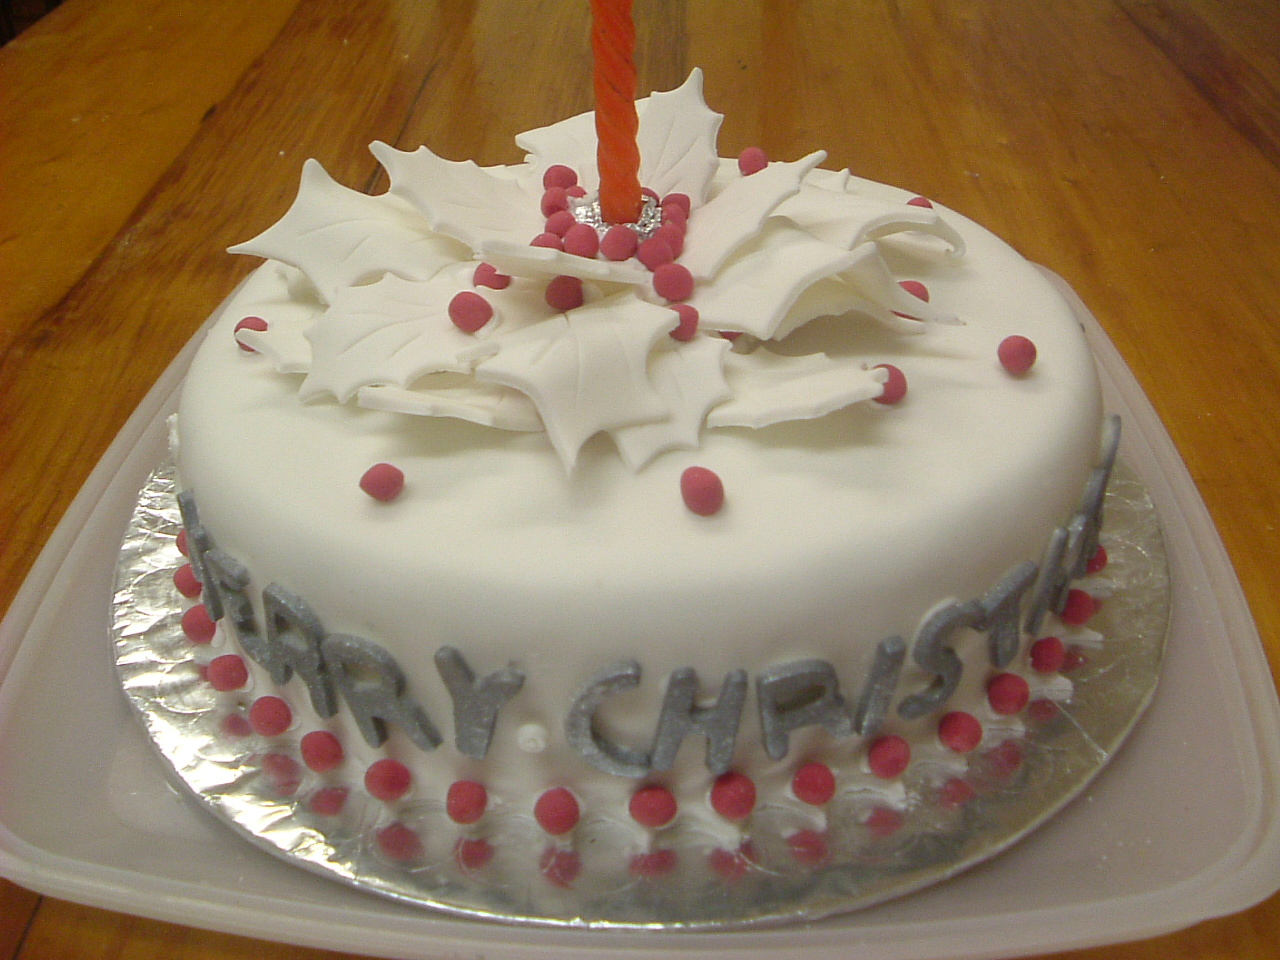
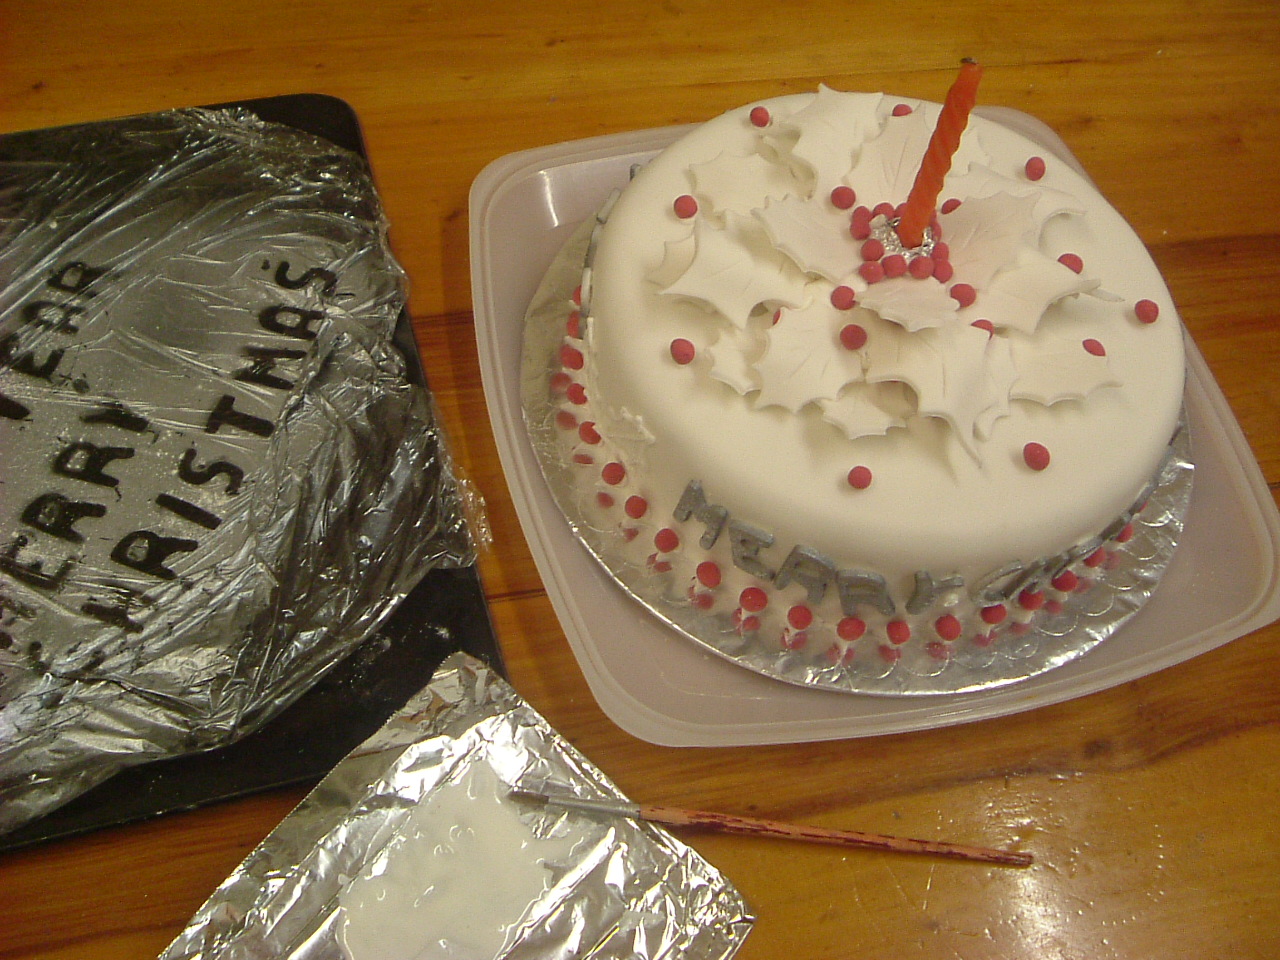
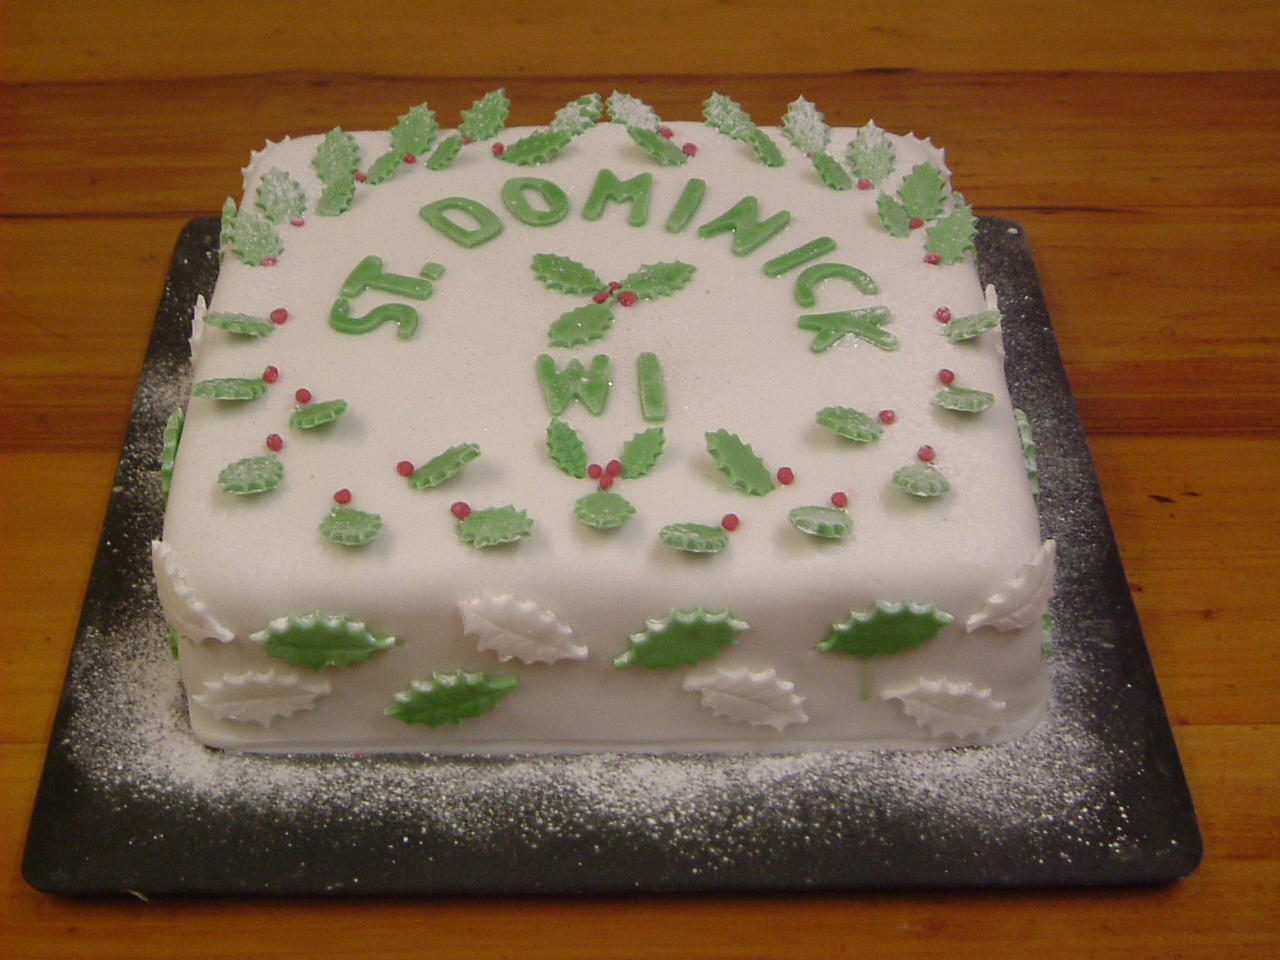
No, it’s not too late to decorate your Christmas cake AND make it look special … let’s be honest here… I haven’t decorated mine yet. But, here’s one I did earlier.  As in; I decorated the Christmas cake for our WI party.. and posted the result on Facebook.. and have had more than a few queries about how it was done.  Well, it was fairly simple and really didn’t take very long – though some drying time is needed between stages .. and luckily I had taken a few photos as I went (not really enough but I hope it will give you what you need) DSCF0063

BASICS:

Not wanting to teach my grandmother to suck eggs… but I am often amazed how many people do not start themselves off with a nice flat cake, trusting to luck that the top of the cake will be flat enough. You may skip this paragraph if you are a grandmother experienced in sucking eggs. 😉  If you are doing a quintessential snow-scene the rough or rounded top really doesn’t matter. For almost anything else cut the top off the cake to level it up. Turn it upside down and set on the cake board: the base is now the top and will be lovely and flat!  This can be stuck in place with a blob of royal icing or jam  (though the latter not so firm)  Hint: measure up the sides to the point where the rounding starts. At the same level on 4 sides (or corners if you are doing a square cake), slice into the cake. then, keeping the blade level with the table top work round to the next cut… thus joining the cuts up, all at the proper level, when all the side/s have been cut into then slice through the centre. You should now have a cut ‘top’ surface but a level cake – then you turn it over.

ROLL-OUT

I like fondant icing and, though I did once make it, I usually just buy Regal Ice.  I prefer this one for flavour and texture – but you can use the others if you prefer. If you like marzipan, by all means give your cake a layer of that. Certainly at this late stage it is not necessary to prevent colour ‘bleed’ from the cake coming through, so if you do not like marzipan ( as I do not) you do not have to use it!  The following  instructions would apply to marzipan as well as fondant.

Heat a tablespoon of apricot jam in a small container (Microwave until just bubbling would be fine) Brush the warm jam all over the cake top and sides.

On a worktop dusted liberally with CORNFLOUR (not icing sugar) roll out a kilo of fondant icing. I usually thump it about a bit first to make it square rather than rectangular and it also seems to soften it a bit before rolling.

Roll to a minimum thickness of 5mm – 7mm is preferable – thicker than 7 and it’s just too much icing, thinner than 5 gets tricky to lift and smooth.  Keep turning or moving the icing to make sure it isn’t sticking to the worktop at all.

When it is at least 2 inches (5cm) larger than your cake surface-area, lift, using a rolling pin to support the icing , and drape over the cake centrally.

If it is a square cake: gently, with cornflour dusted hands, ease and smooth the icing down over the corners first. This will leave ‘baggy’ bits along the sides, but with gentle easing this bagging can been smoothed away along the sides until they, and the corners, are all smooth.

If it is a round cake: gently, with cornflour dusted hands, ease and smooth the icing down evenly, so the baggy areas are evenly spread. With gentle easing this bagging can been smoothed away leaving the icing even all around the sides. DSCF0049 edge crop

Make sure your hands are well cornflour dusted and ‘polish’ the top and sides with light circular movements. Press down around the base towards the cake-board.

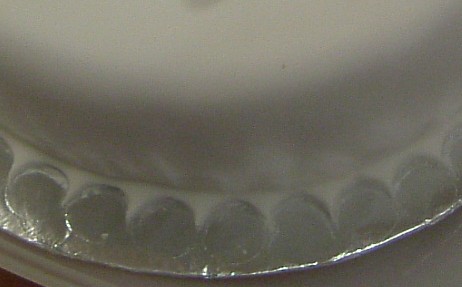
The icing lapping onto the board can be dealt with in a number of ways. It can be trimmed tight to the cake, which leaves an edge that calls out for a piped trim. You can make sure it covers all the board, and smooth it down right out to the edge and trim level with the edge of the board, or you can cut it into shapes, a wavy line is easy, or use a cutter to give a trimmed pattern. On the cake I made for WI I used a small circular cutter* to make lots of small spikes. *flat-ended apple-corer – but I could also have used a icing nozzle – same size)

Take the excess icing and roll it up together again. If you have some gum tragacanth powder then blend in about quarter of a level teaspoon by kneading it well – this will make the icing harden much better.

Making the DECORATIONS {Note: if you are running VERY close to the date, cut off about a quarter of the kilo of icing and make the decorations first .. then cover the cake when they are dry and ready. Keep the rest of the roll-out well wrapped in cling-film and sealed in an airtight bag}

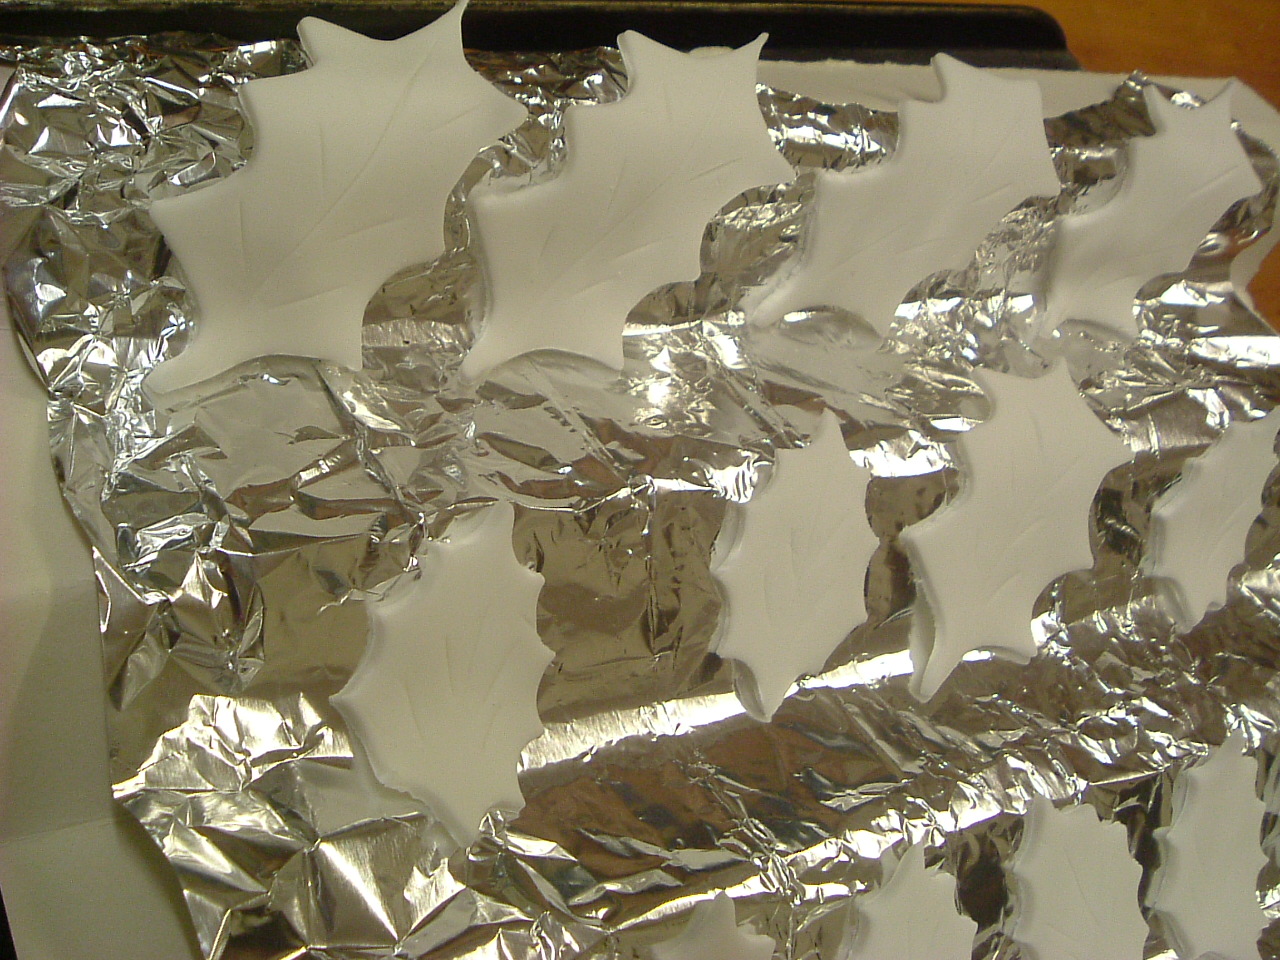
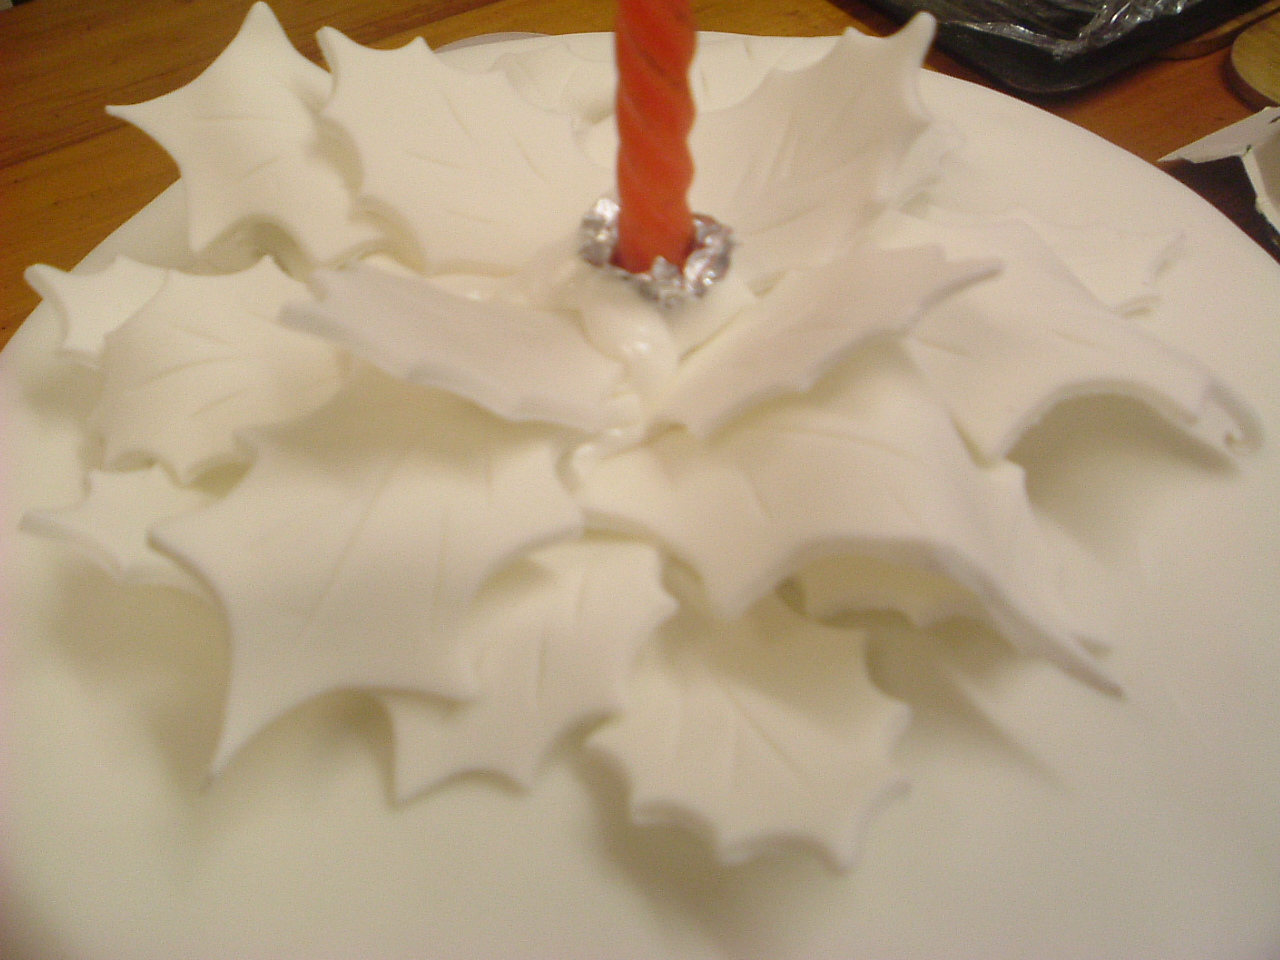
Roll out icing.. thinner than before. You can use a holly cutter (or two) as I did… but if you haven’t got holly cutters you can use a fluted (sweet) pastry cutter (most of us have those – right?)  See HERE for pictures how to make this type of holly leaves in a previous blog. I then like to mark these with a knife – to show centre line and veins – just a few marks – not necessary — but … DSCF0047DSCF0048

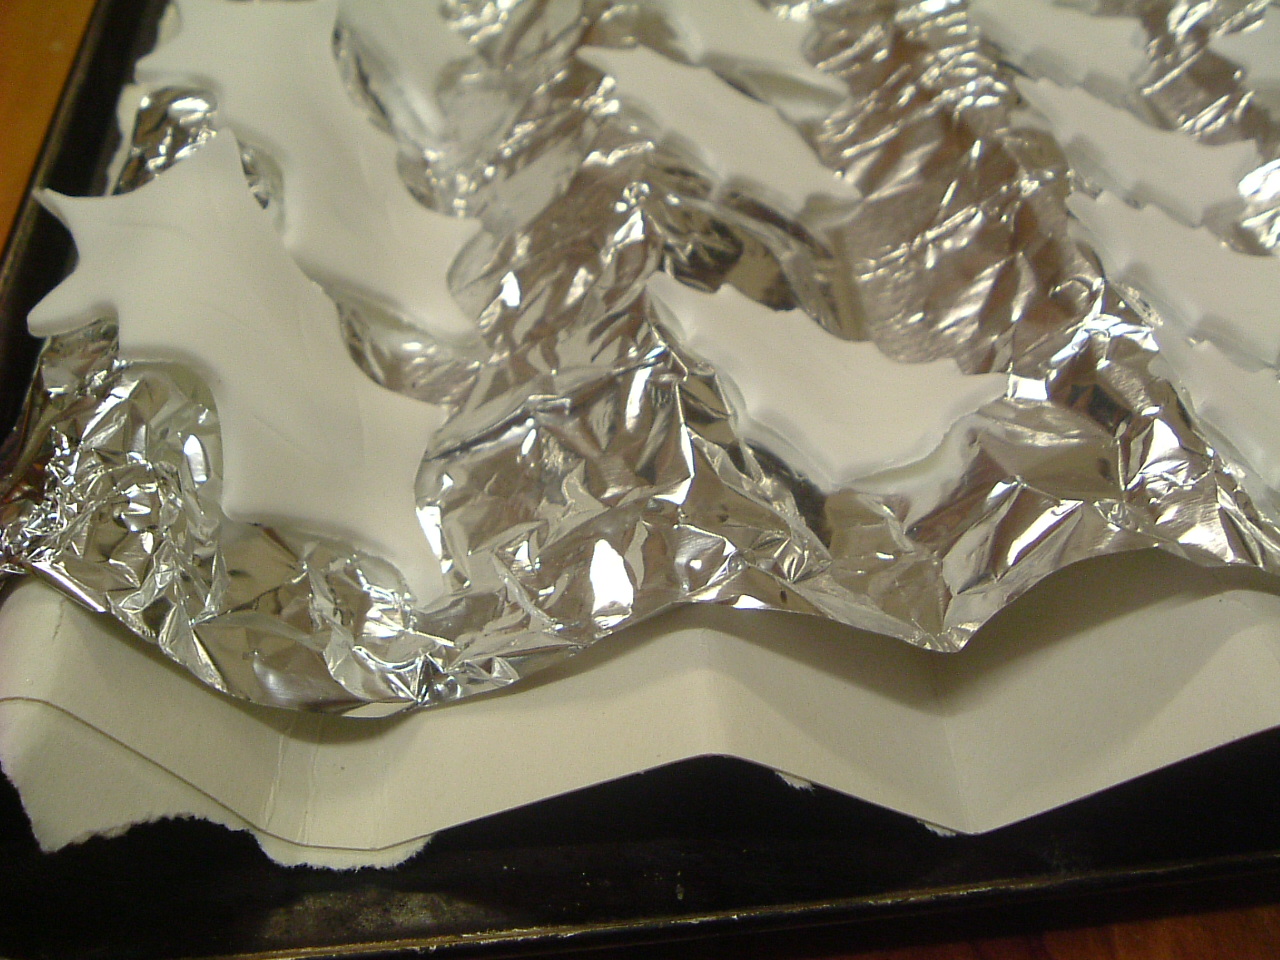
Prepare a A4+ piece if card by folding it into a zigzag and cover it with foil or cling-film. I always  have an odd cereal packet folded up in my cupboard 🙂 (hangover from having children – great source of scrap card) .

As you finish each holly leaf drape it over this zigzag – so each one will have a different curved shape when they dry.

Take remaining fondant and colour it red. Roll it out and cut out letters to spell Merry Christmas and Happy New Year…. if you have letter cutters (A really great item to have in your cake decorating armoury!) – if not then  roll into long thin sausages, shape the letters to spell Happy DSCF0052Christmas, leave to dry on a tray which has been covered with cling-film and dusted with cornflour. (my photo shows silver words — but let’s keep this simple eh?)

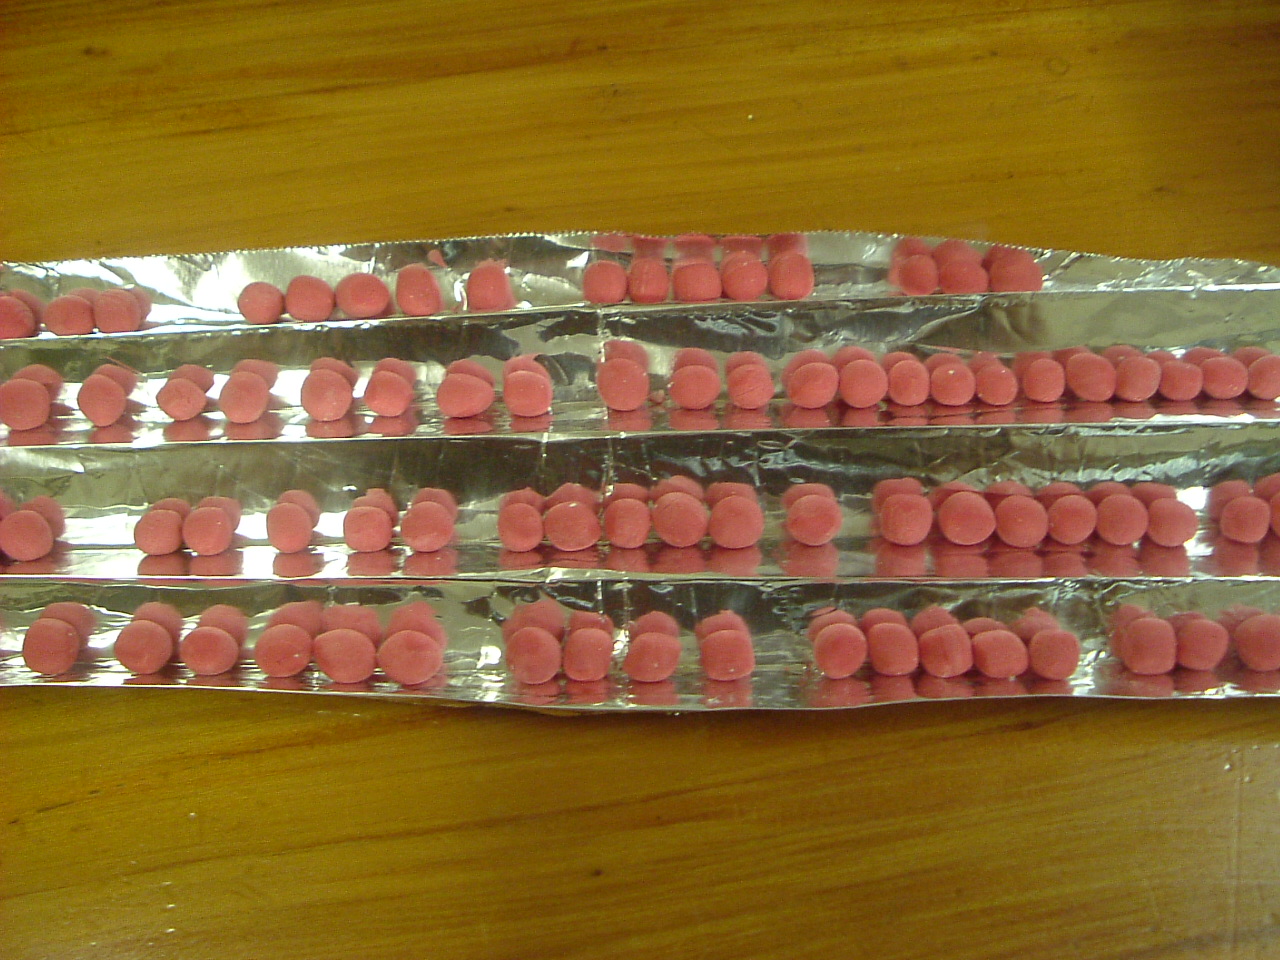
To make holly berries roll out a long  thin sausage and cut small even sized pieces and roll to make berries – leave to dry on something they won’t roll off of!!!


ASSEMBLY

Make up 1 egg-white’s worth of royal icing (1 egg white beaten with about 200g/8oz sieved icing sugar until thick and glossy)  (or use ready to mix royal icing – about 100g / 4oz) DSCF0051

If you want a candle as I have in the centre wrap its base in a piece of foil.

Put a large blob of icing in the middle of the cake, carefully site the candle in the centre – do not worry if it wobbles at this stage. Add the dried holly leaves starting with smaller ones round the base and culminating with four large ones at the top. This will all help stabilise the candle. Drop some berries onto the wet icing amongst the holly leaves.  Carefully remove the actual candle and leave this arrangement to set.

DSCF0060Mix a little of the icing with a drop of hot water to make a slightly runnier ‘glue’, using a small brush paste the back of the letters and carefully position on the sides of the cake – hold each one a moment to make sure it is holding on. Using the same technique place a holly berry at each spike round the base, then distribute the rest at random but evenly over the remaining space on the top.DSCF0057

Allow all to set then keep covered until the day 🙂 DSCF0066Replace the candle and it is ready to show off.

By the way.. this is not turning into a cooking blog – promise – but if I left this one until next week it might be too late to decorate your cake!


Confession – I have been known to decorate my Christmas cake on Christmas eve 🙂

Have you decorated your cake yet? Come on – confess!

Do you have a tradition of a specific design year after year or do you vary them?

Do share, you know I love to hear from you!

My Meringue-Snowmen army rides again …

DSCF0041It was our Festivities committee’s BIG EVENT this weekend – it is the one this group was ‘invented’ for … to bring a bit of community spirit and festivity to the heart of the village.. thus a HUGE Christmas tree bedecked with light and a community ‘tree-lighting ceremony’. This is a village event that has grown over the six years it has been running and includes now a ‘lighting’ of the small (planted) tree behind the post-office parking area, the church bells ringing, then the walk to the Hall singing Christmassy songs, where the Hand-bell ringers play and then we have singing of Carols – this year led by the primary school’s brilliant choir. Finally we all get into the warmth of the hall for free mince pies, sausage rolls, juice or mulled cider (wassail) and good fun is had by all……

What has this to do with snowmen … meringue or otherwise?? …. well the mince pies are all home-made and supplied by lots of lovely people including us on the festivities committee. Now I always make my rich shortcrust with egg yolks. Cue meringue –  what else do you use the whites for? However this time I decided to make some mini-mini-pavlova bases as I know I have an event I need to take finger-food along to, and they will do very nicely. I had piped out as many of these as I wanted and still had plenty of meringue mix left and I was suddenly reminded of the mini-snowmen I used to make for the boys to take to their primary school class  party when they were in the infants. (Yes – I know I am mad – as if I didn’t have enough to do 🙂 ) …so I decided to make some of these for the children at the lighting-up event.

However, it was a busy week that also saw me at an event all day Saturday with my books, so I didn’t get them finished in time. After the lighting-up evening I decided to finish them to add to this blog in-case someone out there might  fancy making them too.

Stage one: Make up the meringue mixture as per MY pavlova recipe ( so – 4 egg white – whipped, plus 8 oz of sieved icing sugar – click link for full details – it is an easy and reliable recipe – this would make you two dozen mini-mini-pavlovas and two dozen snowmen)

Stage two: Put in piping bag with large nozzle – I used a very open rose. Grease flat baking trays well. DSCF0004DSCF0003

Stage three: Pipe bodies: Two good squeezes to give a bit of shape. ON a different tray – Pipe heads – one squeeze

DSCF0008
size comparison with a 5p piece

Stage four: Cook – 140 oC  or 120 oC  fan oven best for these very tiny items. About half an hour. Check, should have firm base if picked up. turn oven off and allow to cool in oven. Remove (you can store in an air-tight box until you are ready to use them)

Stage five: Make up 1 egg-white’s worth of Royal Icing (or if you have it – mix some instant Royal Icing) (1 egg white = 6-8 oz sieved icing sugar) beat well until smooth and glossy)DSCF0012

Stage six: divide into 5 portions. Leave one white – colour the others blue, red, black and orange (deep yellow)

Stage seven: Make up 4 small greaseproof icing bags. Follow link (or look under Recipes top-bar drop-down) for instructions.


Stage eight: Snip off end of black (little)  and dot in all the buttons ….. then all the eyes.DSCF0026DSCF0029

Stage nine: Snip off end of Orange (little) – add ‘carrot’ noses.DSCF0032

Stage ten: snip off the ends of red and blue – and more from end of Orange. Create scarves on all the bodies.DSCF0031


Stage eleven: using a paint brush or a cocktail stick add smiles – red or black – as you think fit – I can never make up my mind about this bit!DSCF0034

Stage twelve: Using the back of a teaspoon add a little blob of white icing to the base of the head … and stick the head on the body of each snowman.

Stage thirteen: If you have enough icing left give the snowmen a contrasting bobble hat.

DSCF0038
meet the motley meringue-snowmen crew

Ah! Memories … the meringue-snowman army on the move …. now I only need to find some small children to eat them 🙂

Hope you’ve enjoyed seeing these little fellas come to ‘life’ …

Do any of you make special sweet-treats for your family  at Christmas?

Do share – you know I love to hear from you

So, what does a typical WI member look like? #IamWI

IAMWI3
#IamWI   Ann Foweraker (St. Dominick WI)

Let me say from the start – I’ve been a member of the WI since I was 15  – excepting my years at college, and five living in a city – no WI branches allowed in universities or cities back then, as they are  now. (It’s good to see how well they are developing  in these places now and how many young women are joining them!)  This came about because my mum was going off to her WI meeting ON my 15th birthday… and, as that happened to be the age that you were allowed to join our branch of the WI back then .. I went along. (NB for insurance purposes, apparently, the joining age is now 18)

Now the WI (Women’s Institute) has developed an unfortunate image over the years – emphasised by almost every press report and slanted so that we appear to be jam-making fuddy-duddys and of the pearl and cardie-wearing, tory-voting brigade to boot. Even my Aunt thought this (when she moved from a town in Essex to our Cornish village she expressed this view – despite the fact that I, my mum and another Aunt belonged – none of whom fitted that description in any way whatsoever – except the jam-making part).

‘Jam and Jerusalem’, the papers say, in a disparaging way. Well, yes our rousing ‘song’ is Jerusalem, by William Blake, and I find the ‘bring me my bow of burning gold, bring me my arrows of desire,’ quite stirring 😉 though we do not sing it at our usual meetings nowadays. And as for Jam making – that was effortful war work. What other war work is disparaged?

In nearly a hundred years of being an organisation, the WI has made a huge difference. Though started to help rural women, for education and support, it has taken up the cause in many aspects of life. Some of these then grew into themselves as separate organisations, which still acknowledge their links to their inspiration and formation. Like the Keep Britain Tidy group… an idea and movement initiated by the WI in 1954 and, though now a national organisation, often the people on the ground in villages doing the organisation will still be from the local WI.

Each year we have a resolution and our National arm campaigns on these resolutions. Not just on that year’s one but on any that we have passed over time. They have our mandate; that is the mandate of 212,000 women, to campaign on these issues. Over the past five years these have included ‘No-more violence against women’ ‘SOS Honeybees’ ‘The need for more Midwives’ ‘Care not Custody – for people with mental health issues’ and ‘Time to Talk – about Organ Donation’. It educates, it campaigns and is listened to.

Yet still the WI is disparaged, though now we are also the ‘calendar girls’ (a doubtful accolade) where some potential members are as wary of being asked to strip off… as much as to run a cake stall (or should that be buns?)

So, when one of our members on the UnOfficial WI FB page, a page for WI members to chat and share (not the Official WI FB page which is more for National WI matters) suggested we each took a photo of ourselves holding a sign with the words I AM WI written on it – I thought this a great idea – for, though you know I like making Jam (in my microwave), I also think I am a typical (but NOT-STEREOTYPICAL) WI member! Active in my own life and in the community, busy and enjoying life to the full.

All of which explains the photo of me and my paddleboard at the top of this blog  🙂

Do you belong to the WI?

 If not, what is the image you have of the WI

 Look out for the hashtag #iamwi

How to be a Pirate …

You may have missed me ( or not) but I have been away and had not got my act together sufficiently to have blogs up and ready to post. I had been a very good girl earlier when I knew I was going to be busy and had prepared posts for your delectation. However, in the afterglow of being visited by my ‘long-missed’ grandchildren I did not get more in hand for when I went away. Enough waffle! (or perhaps not …  that might mean the end of the whole blog if I say that!)

Now I am not here to suggest that you learn how to take hostage hapless yachts as they sail round the world, or to pirate music, or (worse still) ebooks. No, being a pirate is what I was having such fun doing when my grandchildren visited for a while. As they live on the other side of the world and I hadn’t seen them in the flesh for two years, you can imagine I was excited.

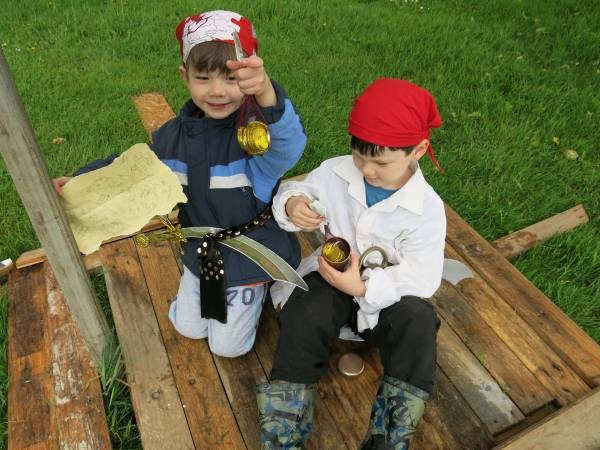
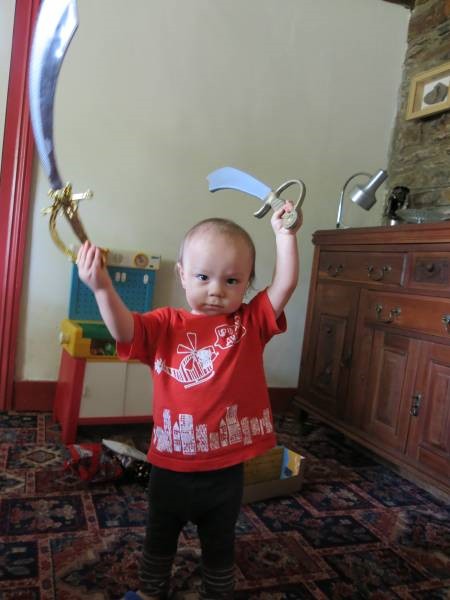
The youngest was just 17 months (and I had not even cuddled him) the other two, one nearly five – the other nearly 7  – and all boys! I was a granny prepared. I had collected bits and pieces and put them in boxes – different boxes to spark different games or activities. So on a nice dry day when we opened one box in it they found scarves (triangular) red or mostly red, a couple of pirate plastic swords, some black and gold strips of cloth to make belts with, a pirate sticker-book and some squashy pirate figures (for the little one)

boys on ship
Boys on the ‘ship’

Now we are lucky.. we have a big garden .. and the type of washing line that is hauled up a steel post – renamed ‘the mast’. This made building a pirate ship easier. We headed off to the ‘old wood’ shed and collected lots of pieces of wood that had come from taking old pallets apart.  Even the 17month carried planks. And we ‘constructed’ a ship around the ‘mast’, in outline, with planks across to sit on for a deck, a plank to walk (of course) pointing out from the ship.  The finding of an old piece of flue trunking made a great cannon. A heavy lump of metal ( U shaped) was chosen to be an anchor  and duly tied to the ship with binder-twine. The sail (an old sheet with skull and crossbones drawn on by gran and shaded in by the boys) was tied to garden canes and thence to the washing line… this meant it could be raised and lowered using the line mechanism, and an old plastic lid was nailed to a piece of wood and hammered into the lawn to make a steering wheel. All that was needed now was good imaginations 🙂

The dog served very well as a sea monster too, sharking’ her way around the lawn…  and duly jumping on me when I was made to walk the plank and fell into the ‘sea’.

So the first day of pirating went well, with the rowing of totally imaginary rowing boats to islands  (trees and their patch of shade on the lawn) and general taking in turns to be captain and making the others walk the plank and chasing around the place.

boys find treasure map

Pirate Day two:  Granny prepared again I had filled a cannister with small bags of  money (5ps and 10ps that their great aunt had collected from her loose change for them) and some lovely bright shiny glass cabochons (that you can put in the bottom of vases etc) to be jewels, and had sneaked out and buried it under the leaf-litter in the woodland garden.  In another cannister I had hidden a Pirate map .. with the features of the garden all given new piratical names – hence the pond became Dragon Lake… and a stone bench became ‘the lookout point’ etc… Of course, on the map X marked the spot… and after hiding the treasure I had marked the spot with an X made of sticks… just as well as it turned out 🙂

boys treasure hunting

I informed the boys that I had heard that there was pirate treasure on the island nearest the ship… so we all ‘rowed’ to the island and searched it. No treasure but the cannister with the map was found. We then rowed back to the ship and read the treasure map, worked out we needed to row to land, collect some shovels and set off on the journey……..

What fun! Carefully they made their way, finding the features as we went… but not just running straight to where the X should be … eventually I had to focus their search on where the X might be in relation to all the other things they had found…and that was when I asked them how they’d know where the treasure was buried. ‘There will be an X on the ground’ – I was told, with certainty!

The X was found … dug up .. and the treasure taken back to the ship… *sigh* We had so much fun!

boys openind treasure
Back on the ship – opening the treasure (2)

Later we decided to visit the post office as I thought that they could buy something with their treasure money … the oldest was a bit worried that the money might not be real (after all he’s used to ringgits)

The lovely lady who runs the post office entered in to the spirit of things and matched  her real money with the pirate money, which showed them it was real.. and they bought themselves a small treat!

boys I can be a pirate too
I can be a pirate too!

The ship was in use day after day(until grandad wanted to mow the grass) – with the boys playing their own games .. and a second map was found on a different day sending them on a different treasure hunt – this time with some chocolate gold coins in the treasure cannister!) Pirates was only one of our games – we also played other games  (with different things in a different box to kick it off)

Are you a granny who loves to play?

Do you believe imagination is the best toy?

Do share – you know I love to hear from you


Addendum:

On the anniversary – 100 years since ‘the war to end all wars’ began

How to Grow Poppies

For flowers in abundance
row after row, whole
landscapes turned crimson, first
turn the soil.
Digging trenches works well.
Poppies thrive in open spaces,
the removal of trees and other shade
is recommended.
Fertilize well, blood and bone is best.
Water in, a long winter of rain at least,
and leave … nature will do the rest.

©Ann Foweraker


from our forthcoming collection (Liskeard Poetry Group)

Reflections WW1 Poems

When is a shoe not just a shoe?

Sounds like a riddle – or the first part of a not very good joke. In this case it is the question that goes with this picture.

shoe

This is a child’s shoe found in the stonework and mud filling of a building thought to be at least sixteenth century.

At first this seemed just a curious thing to find … then I did a little research. Shoes, it turns out, were often placed in the fabric of a building. Most usually near a door way or an opening (window, hearth) but not always, sometimes just placed there by the builder as they built the property.

The big question is ‘Why?’

Well there are many theories and I’ll pass on some that I have come across. To start with the concealed shoe, and it is nearly always just one,  is always well worn and frequently that of a child. One theory is that a shoe takes on something of the identity of the person who wore it – as it moulds itself to the wearer. That this identity or ‘soul’ within the shoe was the used as a spirit to ward off evil in general and witches in particular.

The spirit within the shoe would therefore guard the house and keep evil and witches at bay. The concealed shoes were therefore either hidden in the walls of the building, so no-one could remove them, or boxed in near an opening (that a witch or evil might try to enter through).

When life and death, through accident or illness, was pretty random and struck seemingly at will, superstitions were rife. Here was a way to protect your home and therefore your family – and easy enough to do. Even for the builders who placed them there, perhaps it gave them a sense that the building they made was protected.

Where did this odd idea come from?

No-one knows how this tradition began but in the UK it may have links the 14th century Rector of Marston in Buckinghamshire, who was said to have cast the devil into a boot, thus trapping him, or it may go back much further than this and may be more grisly ….

There is a long and murky history of blood sacrifices, usually of animals, being made to protect a house from evil, documented from as far back as the Romans.  Even the mark in blood made on the door post by the Israelites, when Moses was trying to get them released from servitude, that meant the angel of death passed over their homes, links into this superstition. Maybe a shoe is a simple and less drastic substitute.

Museum of shoes

In Northampton Museum, once the centre of shoe-making in the UK,  they have a collection of shoes. They also keep a concealed shoe index listing all those found and reported to them. At the moment the index stands at approximately 1,900 entries from all over the U.K and also records concealed shoe finds in North America, Canada, and a number of countries in Europe including France, Spain and Poland.

Inspiration

As an author I can’t help but lock these nuggets of information away, wondering when they will resurface in the plot of a novel. Somehow I feel this one is going to with the superstition and history it has all wrapped up in it!

 So the answer to the riddle …..  When is a shoe not just a shoe ….

 …… when it is an insurance policy

 Was the idea of concealed shoes new to you?

Have you ever found something like this?

What tickles your creative bones and makes you start to think and wonder?

Do share – you know I love to hear from you.

Did you miss me? Sorry – I was decorating this cake…

yes… I missed my post date …!  What was I thinking doing?

Well I sat down ready to write and then I had one of those moments when you realise that you haven’t done something that MUST be done… and there is no other time to do it than right NOW!

Yes – it was Tuesday evening and the WI Christmas cake had to be ready for Wednesday evening… and I was out at the market all Wednesday morning and out again with my OH in the afternoon. Could I do both, blog and decorate the cake? I looked at the time, thought I might but that the cake must come first (sorry) and set about the decorations. DSCF7339 wi cake

It’s not as if I had totally forgotten about this, a few days previously I had made and dried a lot of icing holly leaves and the lettering for the decorations, but there was still the covering, the other decoration bits and the assembly to do.  It all had to be last minute as it was to be a sponge cake ( by request) , and I’d made this and frozen it a week before. I had even remembered in the morning to take it out of the freezer to thaw gently … just somewhere during the day I had forgotten it again (worrying, or what?).

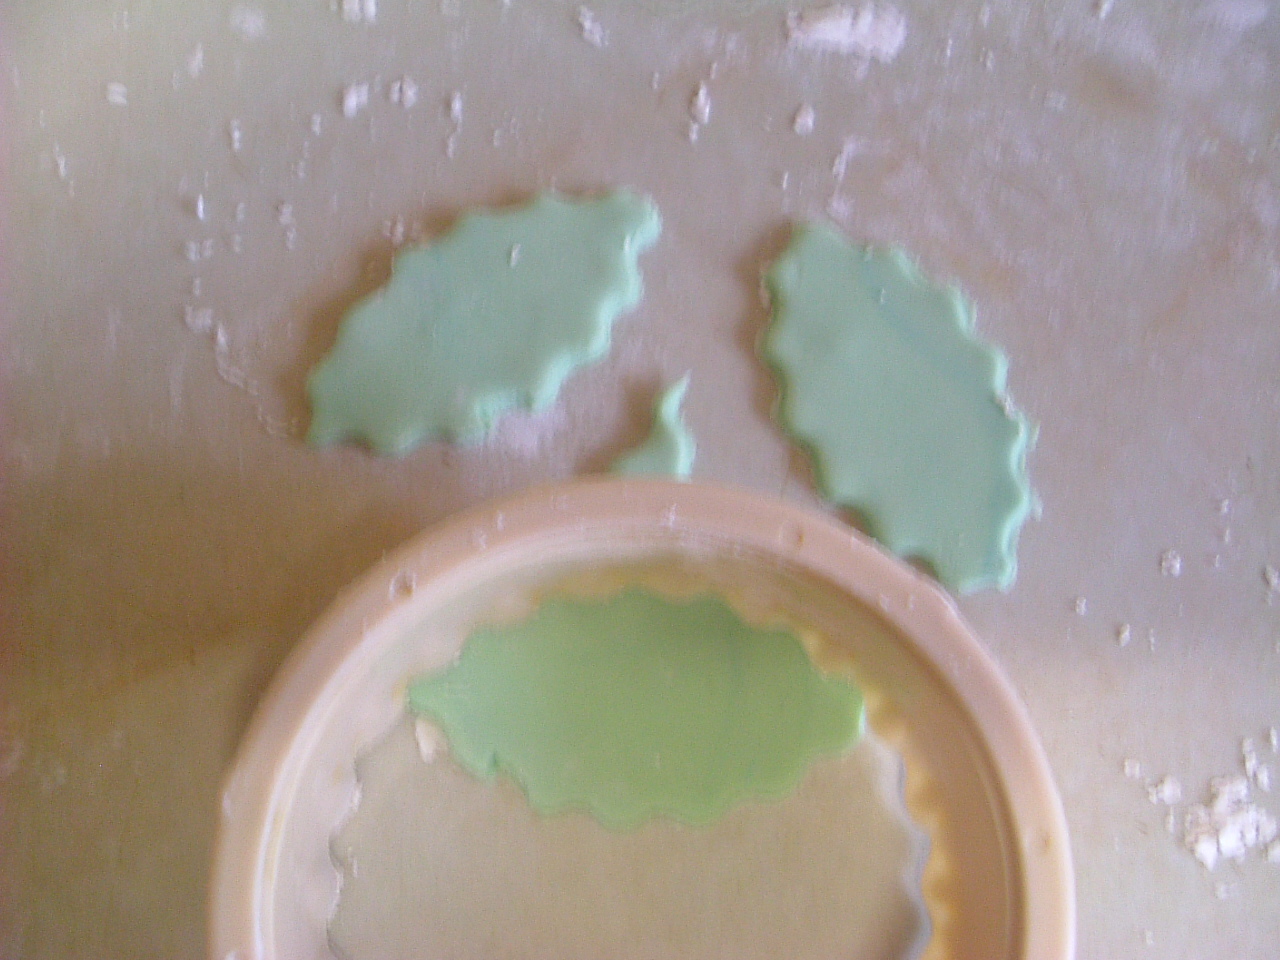
Now I do have a range of holly cutters, but you do not have to have specialist cutters to create this effect – should you wish to – substituting Happy Christmas for the name of our WI, of course 🙂  Holly leaves of three different sizes can be made using just one ‘sweet’ pastry cutter ( the ones with the wavy edges)

Colour some ready-to-roll icing green (I find Regal Ice the best for taste and texture) This is easiest done using powder cake colours rather than the liquid ones – but you can use the liquid if you can’t get hold of the powder – you may just have to knead in a little corn flour to take away the stickiness.

If you have gum tragacanth then blend in a sprinkling to ensure a hard set to your icing leaves. They will firm up as they dry anyway – but gum tragacanth will make sure they are hard.

Roll out your coloured icing on a work surface dusted with corn-flour. This is MUCH better than icing sugar! Use a medium cutter and cut as many circles as you can fit out of the icing. Depending on the size of the holly leaves you want, cut 4, 3 or 2 holly leaves from each circle by cutting on an edge. See photos.

DSCF7343DSCF7344DSCF7346

These can then be enhanced using the back of a knife to mark the rib and veins of the leaf. DSCF7347

Cover a baking sheet with a piece of cling film and dust with corn flour, place the leaves on this and leave somewhere warm to dry. If you want wavy leaves fold or screw up paper of aluminium foil and lay the cling film over this and the leaves on top – leaves will lie on the uneven surface and mould themselves to the shape – resulting in wavy leaves when dry. DSCF7348

If you’ve never used roll-out icing before may I say just four things. 1, Use the base of the cake as the top, and brush warm apricot jam all over the surface. 2, Roll out icing on corn flour – and make sure it isn’t too thin, then lift the sheet using a rolling pin as support and drape over the cake, overlapping the cake out to the edge of the board. 3, Gently press / smooth the corners first (if square cake) then ease the sides down without creases. (If round cake make sure the icing it evenly ‘draped’ around the cake and ease down from the top all round, to form smooth sides.) 4, ‘Polish’ with palm of hand dusted in corn flour, gently and smoothly, then trim off excess.

To attach the holly leaves and letters just moisten the back with water (I use a dedicated paintbrush) and press lightly down – if on side of the cake hold for a moment to make sure it doesn’t slide. To create the 3 dimension effect of holly leaves sticking up, make a small hole in the icing with a cocktail stick, moisten the end section of a piece of holly and press it in, smoothing the icing over the ‘stem’.DSCF7338 wi cake holly crop[

Many, many years a go I bought a set of letters for cutting out of icing – a most excellent and ever useful buy!DSCF7357  However, if you do not have these you can roll out the icing into a long thin sausage ( all that DSCF7358plasticine or play-dough rolling skills come in handy) and use this to ‘write’ a script Merry Christmas on to the top of the cake. Lie it on dry, then when in the right place lift, moisten top of cake and place down in the right place.

Lastly, some white holly leaves cut from the trimmings, mark them up and use to fill in between the green, and a few red berries, made by colouring some of those trimmings red, roll into a thin sausage, cut a small piece, roll on palm of hand and add with the dampened brush tip onto the right place.

So there it is – our WI Christmas cake… and, perhaps, an idea for you – simply done with little in the way of special decoration equipment. Alas, the blog didn’t get written that night … and so this is the new blog post – hope you liked it!

Have you made and decorated your Christmas cake yet?? (Mine is made… but not yet decorated)

Do you find yourself ‘double-booking’ your time?

Do share – you know I love to hear from you

Weird Fruit

Have you ever eaten a Medlar?

DSCF7324 (2)
A plate of Medlars

I ate my first about six years ago … and then last year we planted a Medlar tree. This year we have fruit.

DSCF7327 (2)
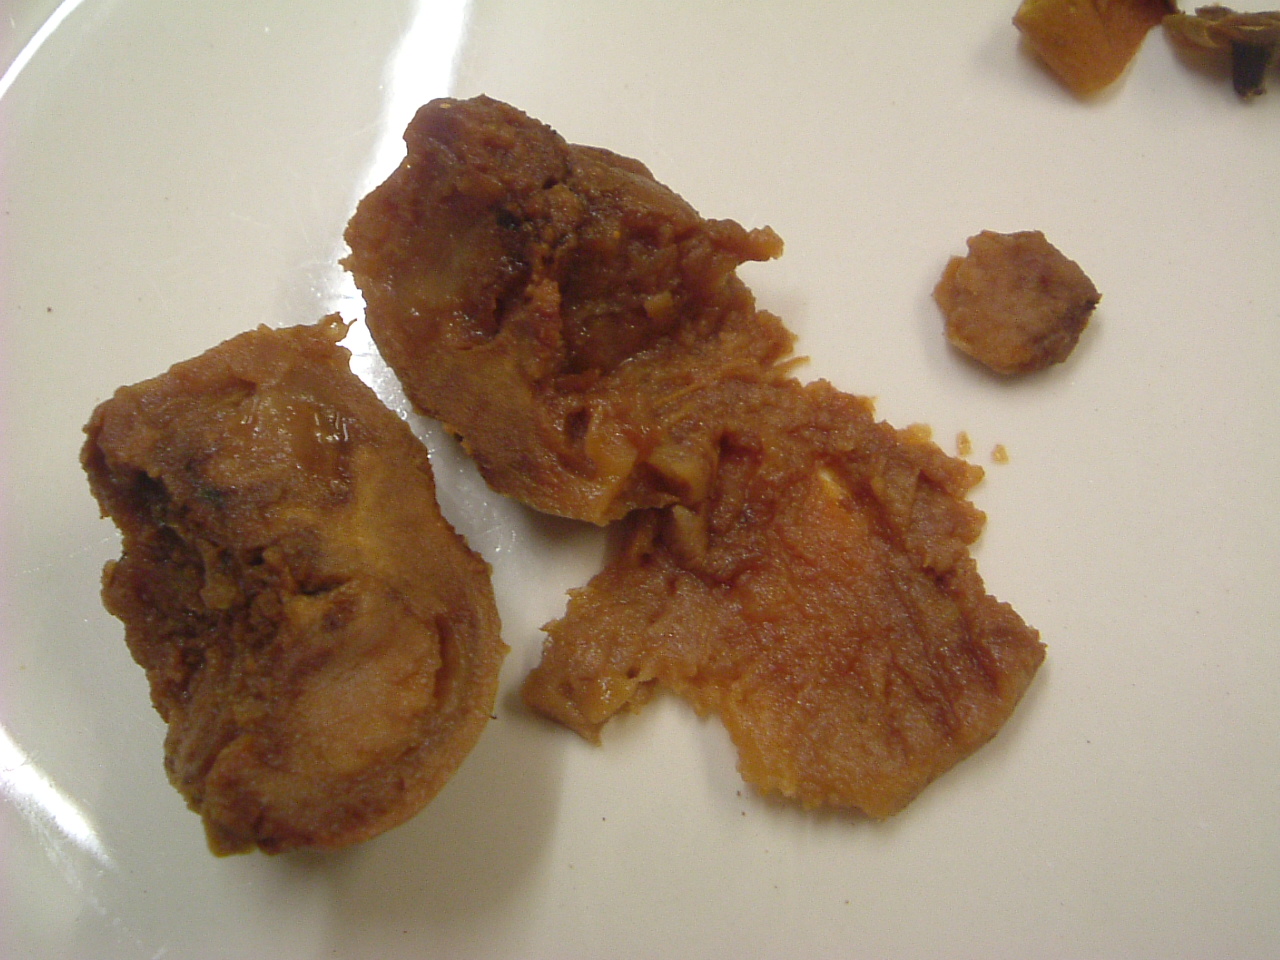
Medlar – papery skin peeled off
DSCF7334
Medlar – cut in half – puree squashed, one seed removed – top right,

It is a weird fruit! It is a member of the rose family despite having the look of an apple about it, albeit with a rather large ‘flower end’ which has in medieval times given it the slang name of ‘open-arse’ .  To me it has associations with Elizabethan England though it is not a native tree and has been cultivated since Roman times. But it is not its appearance that is strange – this is a fruit that has to be ‘bletted’ a word from the French which means ‘softened’ and to do this it has to start to decay –  rather like some cheeses, it goes soft through maturation. Once soft the acidic pale fruit turns a rich brown and becomes paste-like.  Once the outer papery layer is peeled off it can be eaten, tasting like thick apple puree which has been flavoured with spices, perhaps cloves and cinnamon. They do have hard ‘pips’ or seeds’ within them too.

The second weird fruit we have just harvested is a rather late planting of Physalis peruviana or the Cape Gooseberry. DSCF7336 (2)This is the first time we have grown these in over thirty years. A friend gave us these plants, the first lot we grew in the first greenhouse we owned when we lived in Plymouth. Back then no-one had  seen them before – they were truly exotic … today they seem to adorn almost every dessert we have when we eat out* (* not that we eat out often – but these are always there)  However, there is something still a little magical about the golden ball of tart sweetness hidden within the delicate papery lantern.

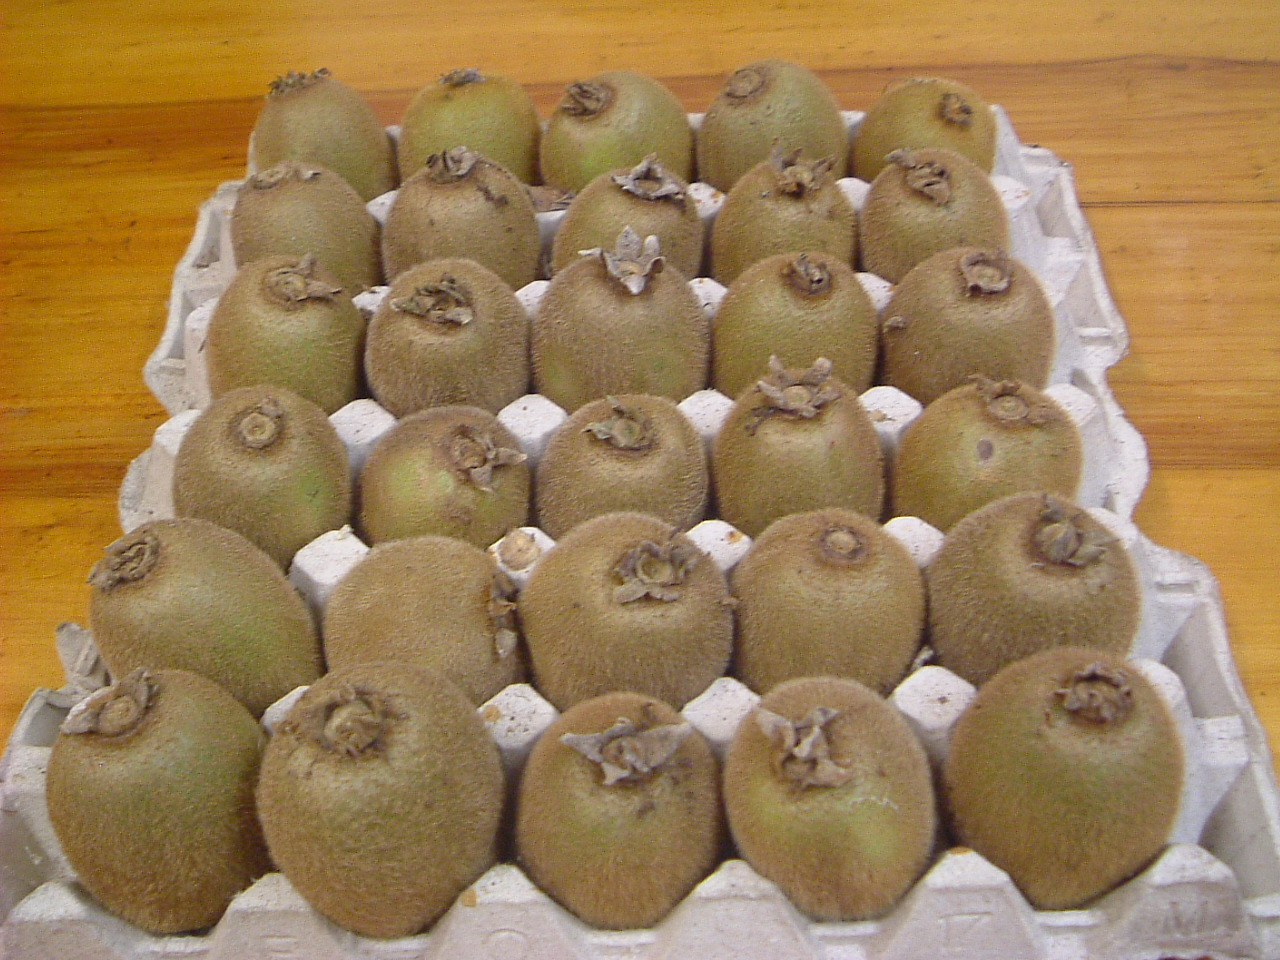
The third fruit we have been harvesting is another ‘gooseberry’ the Chinese Gooseberry (see how I linked those last two) or as it is more commonly known – the Kiwi Fruit. ‘Well, they are not strange or weird’ I hear you say. DSCF7329 (2)Though I always think they are a little weird as fruit goes … the strange thing is that our crop is grown in Cornwall UK .. and our few plants, as in some other years, yielded 657 kiwi fruits! These we stand in egg trays in a cool vermin-proof shed, and bring one tray indoors at a time to ripen an soften ready to eat … they last us well into spring.

One unusual fruit that we have tried to grow but have not had any success with is the black Mulberry. Where I grew up we had an enormous and very ancient mulberry tree.  Quite possibly one of those planted in the 17 century when they were imported and planted in the hope of rearing silk worms to make silk on them. Unfotunately someone was misinformed, as the silk worms prefer the White Mulberry. I loved that fruit and really wanted to grow one here, but all types of propagation and buying of stock resulted in failure. To me, the taste of the mulberry is the taste of my childhood.

Have you ever eaten a medlar, nicely bletted?  What did you think it tasted of?

Do certain fruits bring back memories for you

Do share, you know I love to hear from you.

By the way … ‘The Angel Bug’  is now available in Paperback from AMAZON  all over the world, and to order from all good bookshops, everywhere.

error

Enjoyed this blog? Please share :)