Happy Christmas to All my Readers

DSCF0088Happy Christmas everybody! By the time you get this your Christmas day will be either half over or well over (depends if you decide to have a ban on looking at the computer on Christmas Day or not 😉

Regardless of the time, I’d like to send you all best wishes for the season… and hope you have all you need to make this a happy time.

Here we have family visiting  (#2 son. #3 son and his lovely wife) and will have aunts, uncles and neighbours in for Christmas day, making us twelve.

The Christmas tree is looking it usual crazy self (no restricted colour themes or fashion-following for me)

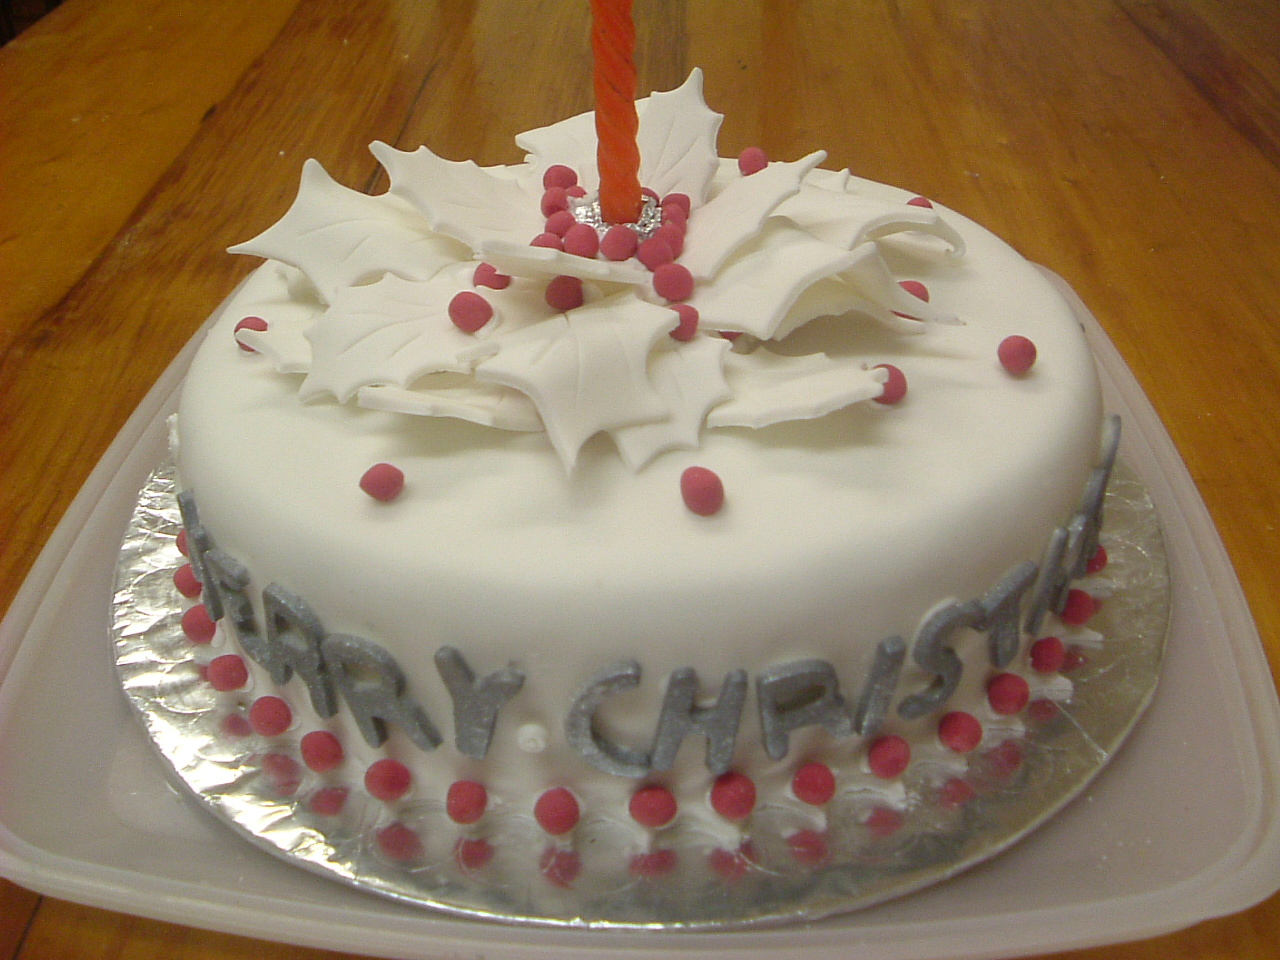
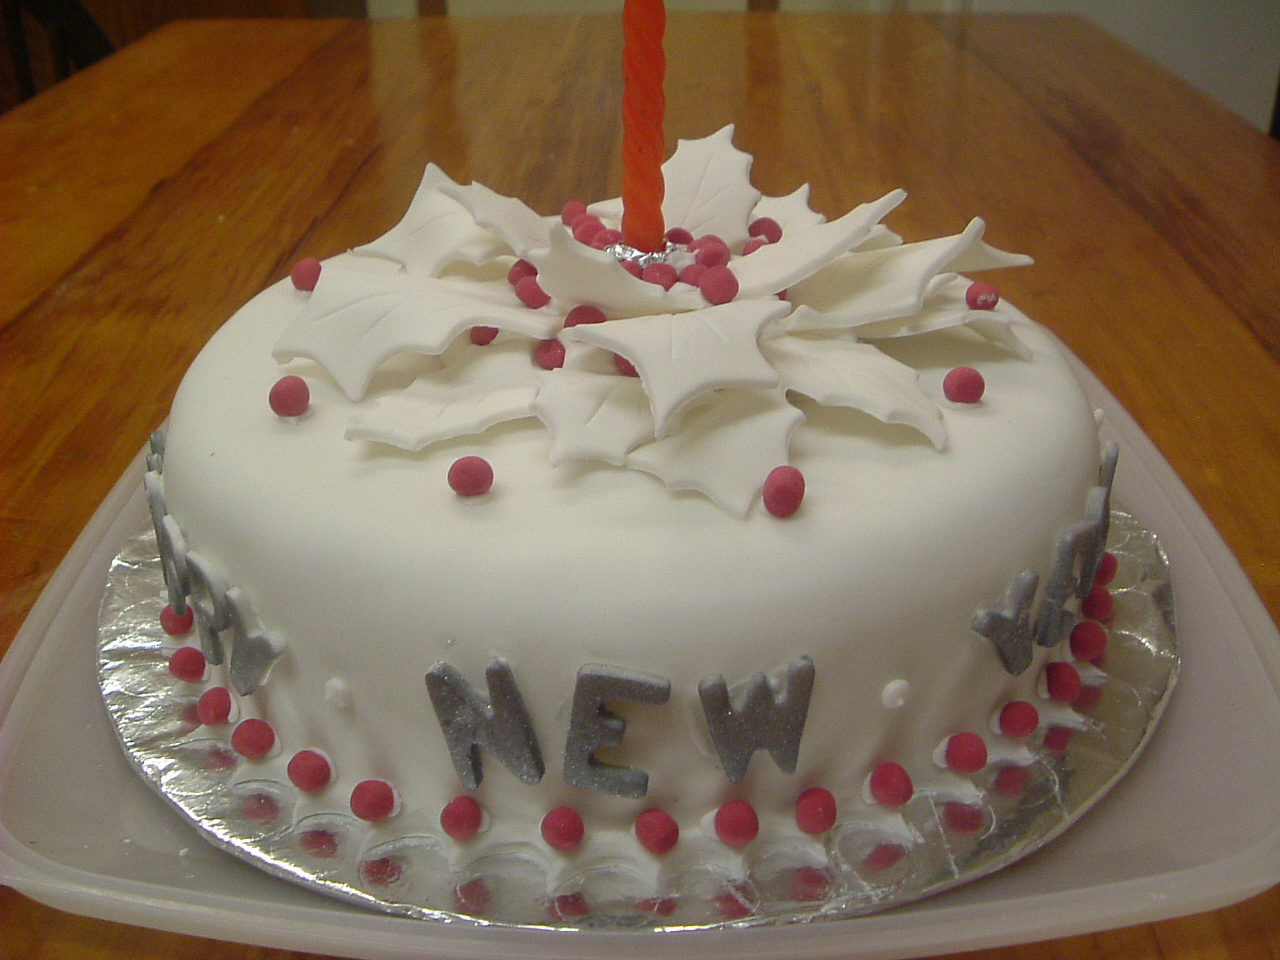
IMG_1648 cropThe cake is a riot of the holly leaves I blogged about making last week

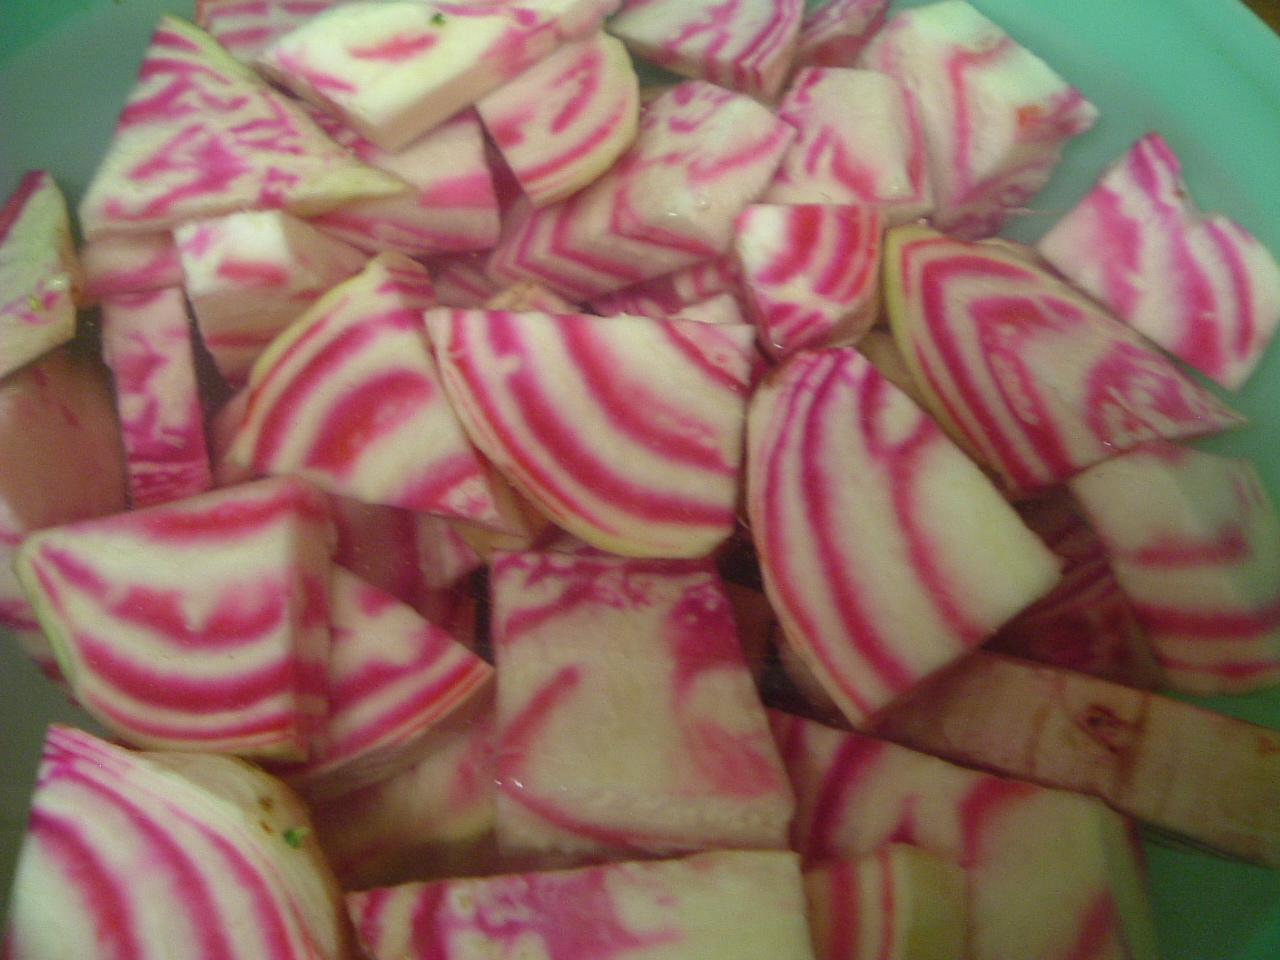
and, as I write, the veg (including a single 3lb plus stripy beetroot from the garden) has been peeled and chopped by my lovely team of youngsters. DSCF0090


So all that is left to do is wish you all the best and thank you all for following the blog and commenting on the pieces, I really do appreciate hearing from you. Thank you too if you are one of the many people who have read my novels over the past year, I hope you enjoyed reading them as much as I enjoyed writing them.

Hope you have a lovely time – Happy Christmas and Best Wishes for a peaceful and joyful New Year

Too Late to Decorate a Christmas Cake??

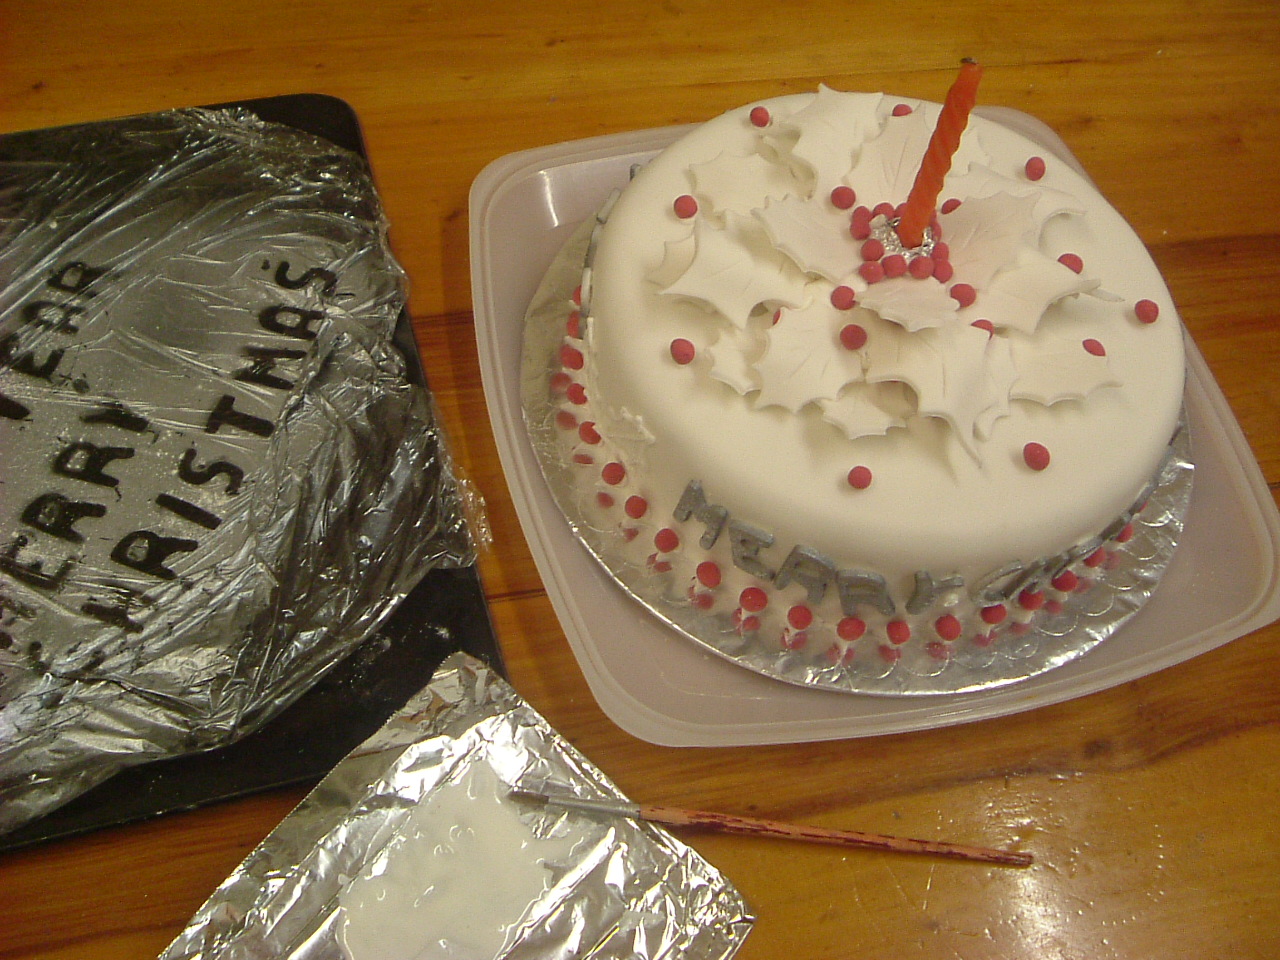
No, it’s not too late to decorate your Christmas cake AND make it look special … let’s be honest here… I haven’t decorated mine yet. But, here’s one I did earlier.  As in; I decorated the Christmas cake for our WI party.. and posted the result on Facebook.. and have had more than a few queries about how it was done.  Well, it was fairly simple and really didn’t take very long – though some drying time is needed between stages .. and luckily I had taken a few photos as I went (not really enough but I hope it will give you what you need) DSCF0063

BASICS:

Not wanting to teach my grandmother to suck eggs… but I am often amazed how many people do not start themselves off with a nice flat cake, trusting to luck that the top of the cake will be flat enough. You may skip this paragraph if you are a grandmother experienced in sucking eggs. 😉  If you are doing a quintessential snow-scene the rough or rounded top really doesn’t matter. For almost anything else cut the top off the cake to level it up. Turn it upside down and set on the cake board: the base is now the top and will be lovely and flat!  This can be stuck in place with a blob of royal icing or jam  (though the latter not so firm)  Hint: measure up the sides to the point where the rounding starts. At the same level on 4 sides (or corners if you are doing a square cake), slice into the cake. then, keeping the blade level with the table top work round to the next cut… thus joining the cuts up, all at the proper level, when all the side/s have been cut into then slice through the centre. You should now have a cut ‘top’ surface but a level cake – then you turn it over.

ROLL-OUT

I like fondant icing and, though I did once make it, I usually just buy Regal Ice.  I prefer this one for flavour and texture – but you can use the others if you prefer. If you like marzipan, by all means give your cake a layer of that. Certainly at this late stage it is not necessary to prevent colour ‘bleed’ from the cake coming through, so if you do not like marzipan ( as I do not) you do not have to use it!  The following  instructions would apply to marzipan as well as fondant.

Heat a tablespoon of apricot jam in a small container (Microwave until just bubbling would be fine) Brush the warm jam all over the cake top and sides.

On a worktop dusted liberally with CORNFLOUR (not icing sugar) roll out a kilo of fondant icing. I usually thump it about a bit first to make it square rather than rectangular and it also seems to soften it a bit before rolling.

Roll to a minimum thickness of 5mm – 7mm is preferable – thicker than 7 and it’s just too much icing, thinner than 5 gets tricky to lift and smooth.  Keep turning or moving the icing to make sure it isn’t sticking to the worktop at all.

When it is at least 2 inches (5cm) larger than your cake surface-area, lift, using a rolling pin to support the icing , and drape over the cake centrally.

If it is a square cake: gently, with cornflour dusted hands, ease and smooth the icing down over the corners first. This will leave ‘baggy’ bits along the sides, but with gentle easing this bagging can been smoothed away along the sides until they, and the corners, are all smooth.

If it is a round cake: gently, with cornflour dusted hands, ease and smooth the icing down evenly, so the baggy areas are evenly spread. With gentle easing this bagging can been smoothed away leaving the icing even all around the sides. DSCF0049 edge crop

Make sure your hands are well cornflour dusted and ‘polish’ the top and sides with light circular movements. Press down around the base towards the cake-board.

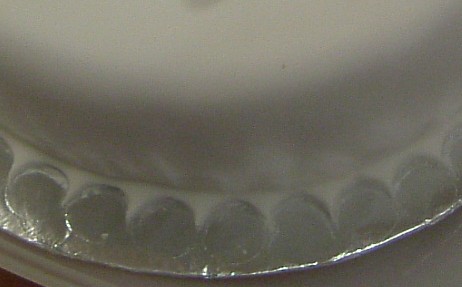
The icing lapping onto the board can be dealt with in a number of ways. It can be trimmed tight to the cake, which leaves an edge that calls out for a piped trim. You can make sure it covers all the board, and smooth it down right out to the edge and trim level with the edge of the board, or you can cut it into shapes, a wavy line is easy, or use a cutter to give a trimmed pattern. On the cake I made for WI I used a small circular cutter* to make lots of small spikes. *flat-ended apple-corer – but I could also have used a icing nozzle – same size)

Take the excess icing and roll it up together again. If you have some gum tragacanth powder then blend in about quarter of a level teaspoon by kneading it well – this will make the icing harden much better.

Making the DECORATIONS {Note: if you are running VERY close to the date, cut off about a quarter of the kilo of icing and make the decorations first .. then cover the cake when they are dry and ready. Keep the rest of the roll-out well wrapped in cling-film and sealed in an airtight bag}

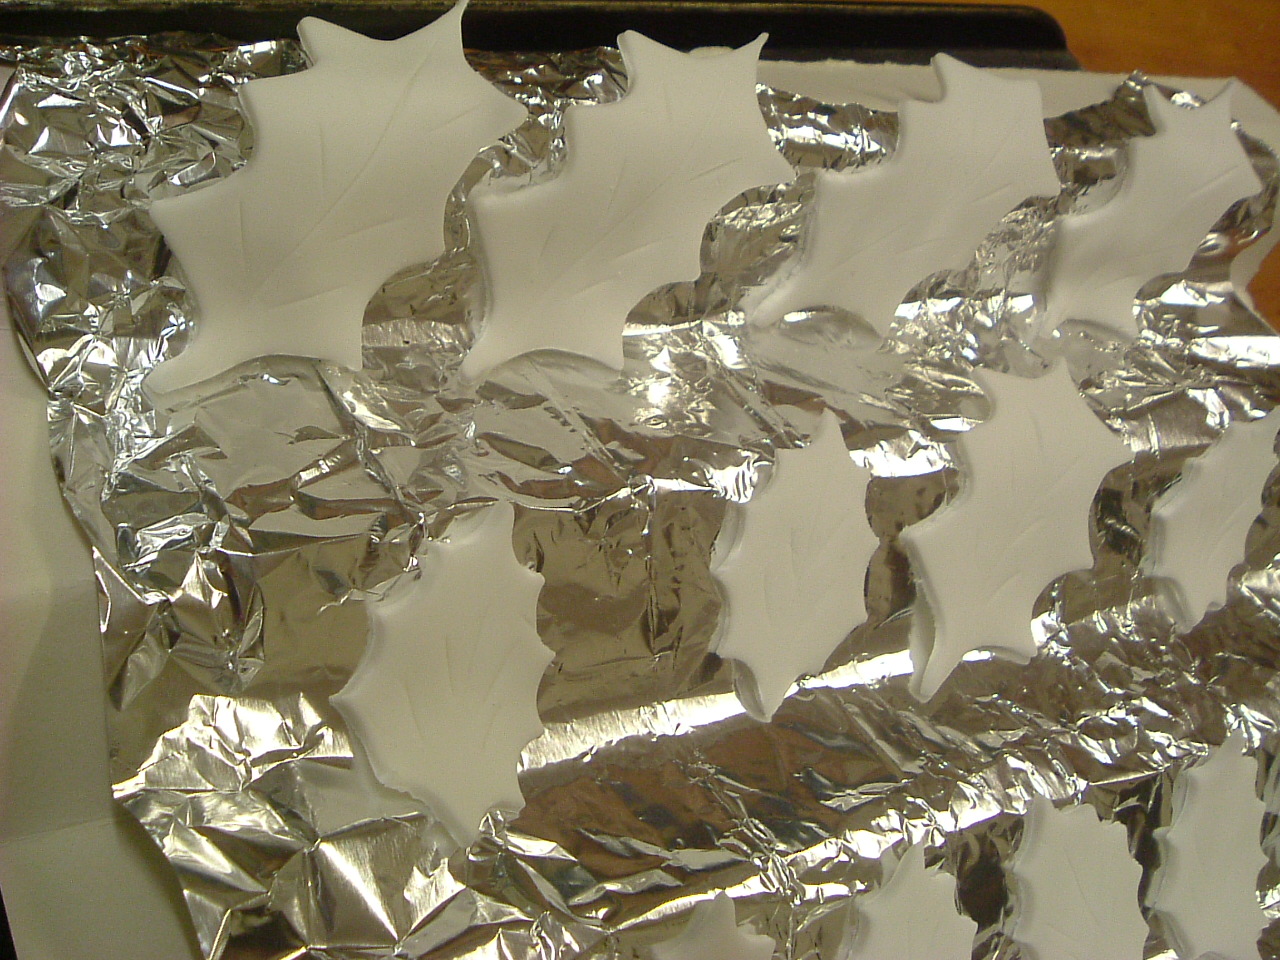
Roll out icing.. thinner than before. You can use a holly cutter (or two) as I did… but if you haven’t got holly cutters you can use a fluted (sweet) pastry cutter (most of us have those – right?)  See HERE for pictures how to make this type of holly leaves in a previous blog. I then like to mark these with a knife – to show centre line and veins – just a few marks – not necessary — but … DSCF0047DSCF0048

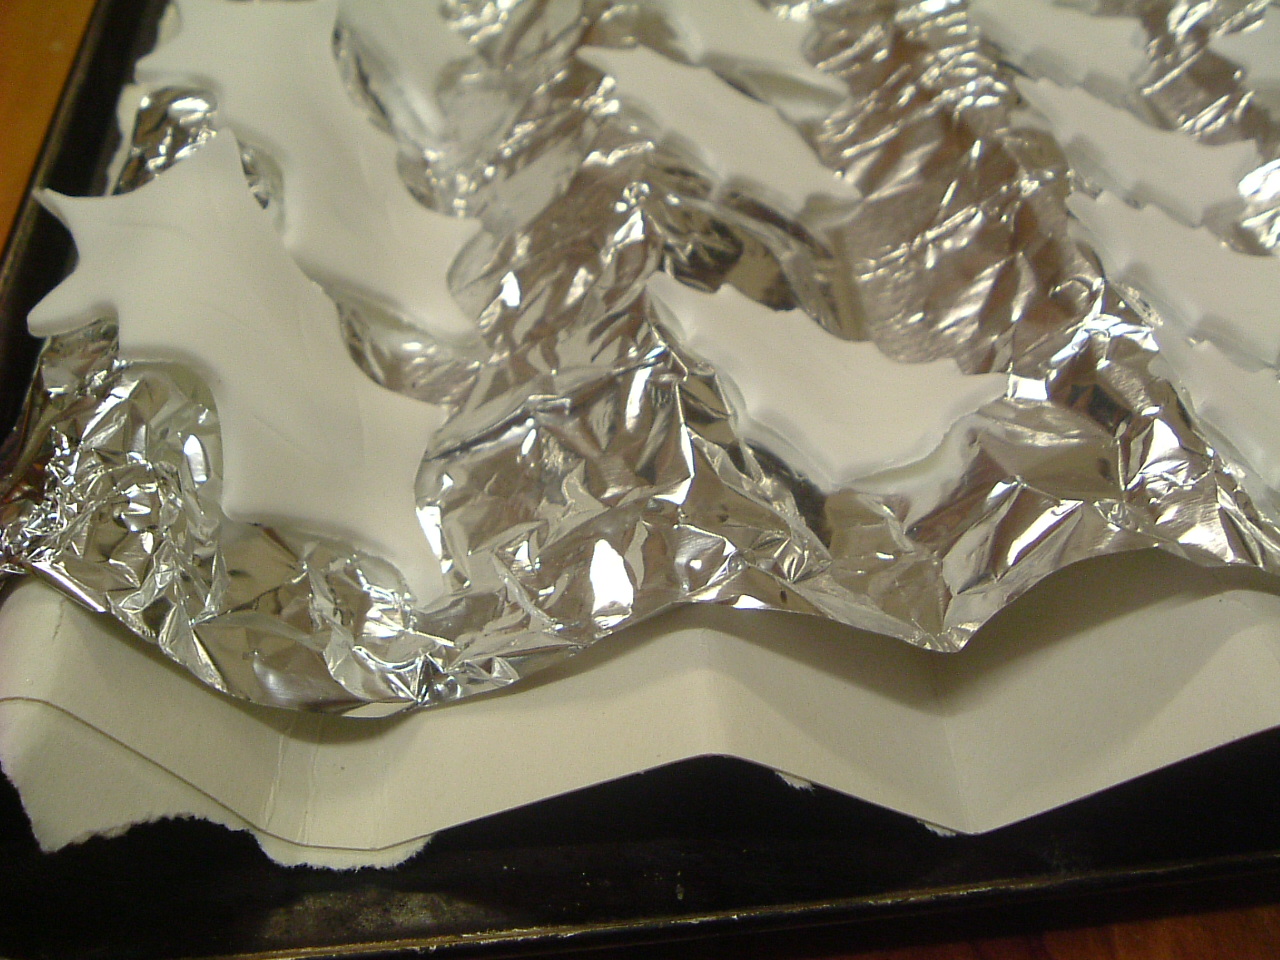
Prepare a A4+ piece if card by folding it into a zigzag and cover it with foil or cling-film. I always  have an odd cereal packet folded up in my cupboard 🙂 (hangover from having children – great source of scrap card) .

As you finish each holly leaf drape it over this zigzag – so each one will have a different curved shape when they dry.

Take remaining fondant and colour it red. Roll it out and cut out letters to spell Merry Christmas and Happy New Year…. if you have letter cutters (A really great item to have in your cake decorating armoury!) – if not then  roll into long thin sausages, shape the letters to spell Happy DSCF0052Christmas, leave to dry on a tray which has been covered with cling-film and dusted with cornflour. (my photo shows silver words — but let’s keep this simple eh?)
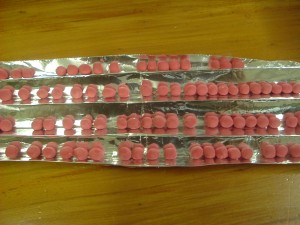
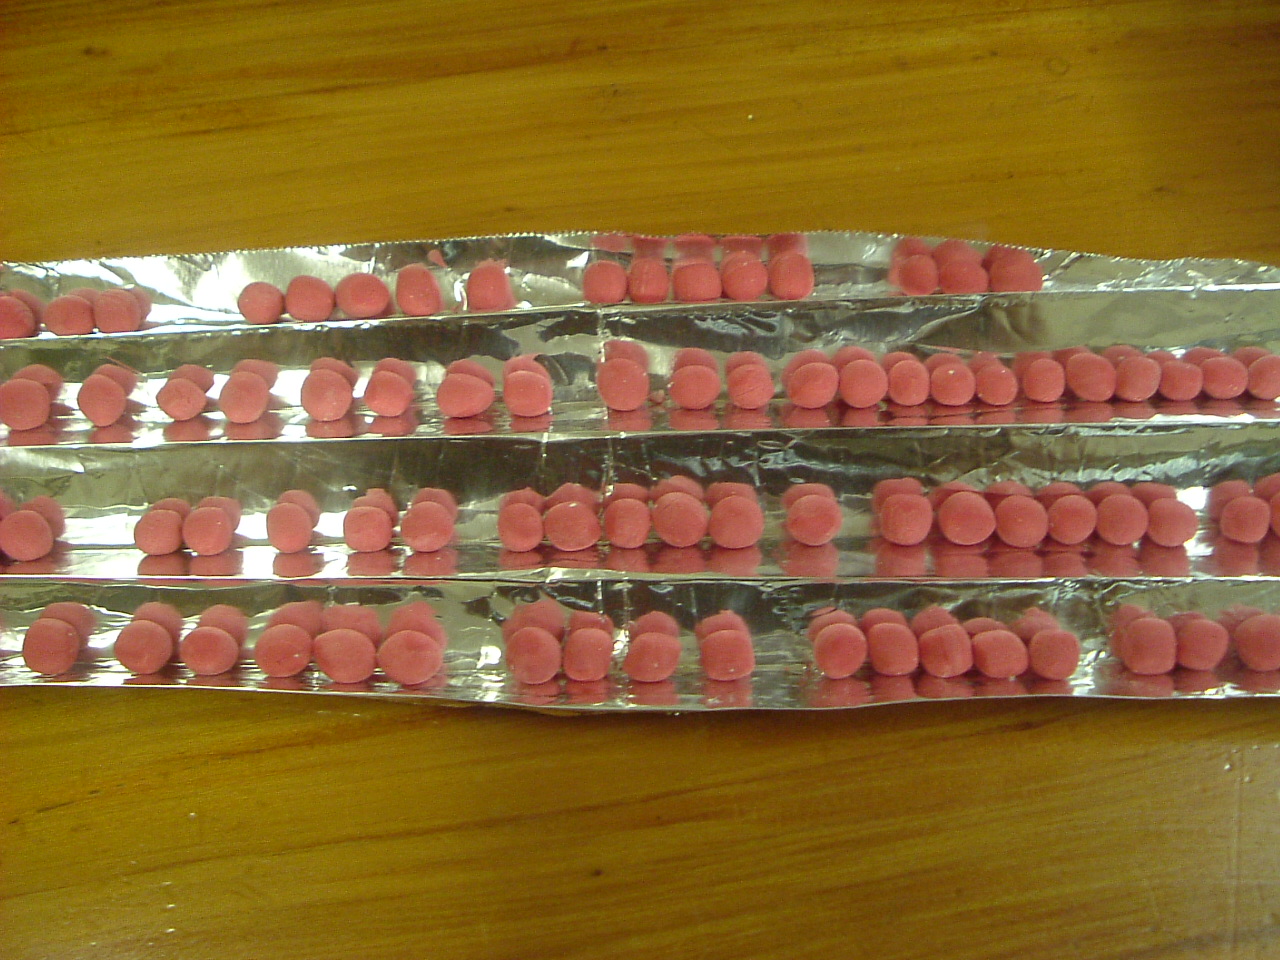
To make holly berries roll out a long  thin sausage and cut small even sized pieces and roll to make berries – leave to dry on something they won’t roll off of!!!


ASSEMBLY

Make up 1 egg-white’s worth of royal icing (1 egg white beaten with about 200g/8oz sieved icing sugar until thick and glossy)  (or use ready to mix royal icing – about 100g / 4oz) DSCF0051

If you want a candle as I have in the centre wrap its base in a piece of foil.

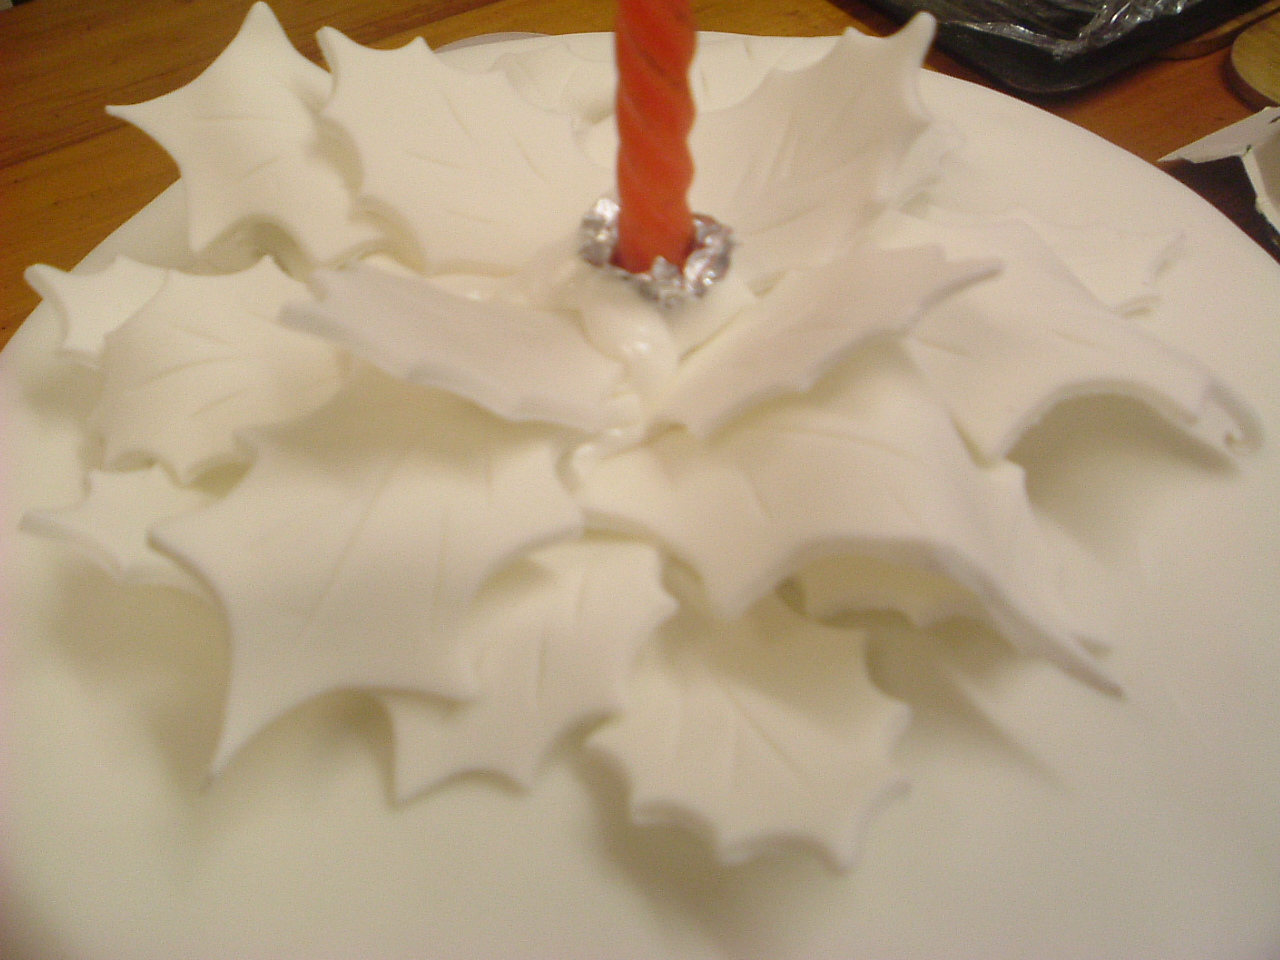
Put a large blob of icing in the middle of the cake, carefully site the candle in the centre – do not worry if it wobbles at this stage. Add the dried holly leaves starting with smaller ones round the base and culminating with four large ones at the top. This will all help stabilise the candle. Drop some berries onto the wet icing amongst the holly leaves.  Carefully remove the actual candle and leave this arrangement to set.
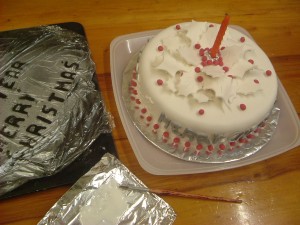
DSCF0060Mix a little of the icing with a drop of hot water to make a slightly runnier ‘glue’, using a small brush paste the back of the letters and carefully position on the sides of the cake – hold each one a moment to make sure it is holding on. Using the same technique place a holly berry at each spike round the base, then distribute the rest at random but evenly over the remaining space on the top.DSCF0057

Allow all to set then keep covered until the day 🙂 DSCF0066Replace the candle and it is ready to show off.

By the way.. this is not turning into a cooking blog – promise – but if I left this one until next week it might be too late to decorate your cake!


Confession – I have been known to decorate my Christmas cake on Christmas eve 🙂

Have you decorated your cake yet? Come on – confess!

Do you have a tradition of a specific design year after year or do you vary them?

Do share, you know I love to hear from you!

My Meringue-Snowmen army rides again …

DSCF0041It was our Festivities committee’s BIG EVENT this weekend – it is the one this group was ‘invented’ for … to bring a bit of community spirit and festivity to the heart of the village.. thus a HUGE Christmas tree bedecked with light and a community ‘tree-lighting ceremony’. This is a village event that has grown over the six years it has been running and includes now a ‘lighting’ of the small (planted) tree behind the post-office parking area, the church bells ringing, then the walk to the Hall singing Christmassy songs, where the Hand-bell ringers play and then we have singing of Carols – this year led by the primary school’s brilliant choir. Finally we all get into the warmth of the hall for free mince pies, sausage rolls, juice or mulled cider (wassail) and good fun is had by all……

What has this to do with snowmen … meringue or otherwise?? …. well the mince pies are all home-made and supplied by lots of lovely people including us on the festivities committee. Now I always make my rich shortcrust with egg yolks. Cue meringue –  what else do you use the whites for? However this time I decided to make some mini-mini-pavlova bases as I know I have an event I need to take finger-food along to, and they will do very nicely. I had piped out as many of these as I wanted and still had plenty of meringue mix left and I was suddenly reminded of the mini-snowmen I used to make for the boys to take to their primary school class  party when they were in the infants. (Yes – I know I am mad – as if I didn’t have enough to do 🙂 ) …so I decided to make some of these for the children at the lighting-up event.

However, it was a busy week that also saw me at an event all day Saturday with my books, so I didn’t get them finished in time. After the lighting-up evening I decided to finish them to add to this blog in-case someone out there might  fancy making them too.

Stage one: Make up the meringue mixture as per MY pavlova recipe ( so – 4 egg white – whipped, plus 8 oz of sieved icing sugar – click link for full details – it is an easy and reliable recipe – this would make you two dozen mini-mini-pavlovas and two dozen snowmen)

Stage two: Put in piping bag with large nozzle – I used a very open rose. Grease flat baking trays well. DSCF0004DSCF0003

Stage three: Pipe bodies: Two good squeezes to give a bit of shape. ON a different tray – Pipe heads – one squeeze

DSCF0008
size comparison with a 5p piece

Stage four: Cook – 140 oC  or 120 oC  fan oven best for these very tiny items. About half an hour. Check, should have firm base if picked up. turn oven off and allow to cool in oven. Remove (you can store in an air-tight box until you are ready to use them)

Stage five: Make up 1 egg-white’s worth of Royal Icing (or if you have it – mix some instant Royal Icing) (1 egg white = 6-8 oz sieved icing sugar) beat well until smooth and glossy)DSCF0012

Stage six: divide into 5 portions. Leave one white – colour the others blue, red, black and orange (deep yellow)

Stage seven: Make up 4 small greaseproof icing bags. Follow link (or look under Recipes top-bar drop-down) for instructions.


Stage eight: Snip off end of black (little)  and dot in all the buttons ….. then all the eyes.DSCF0026DSCF0029

Stage nine: Snip off end of Orange (little) – add ‘carrot’ noses.DSCF0032

Stage ten: snip off the ends of red and blue – and more from end of Orange. Create scarves on all the bodies.DSCF0031


Stage eleven: using a paint brush or a cocktail stick add smiles – red or black – as you think fit – I can never make up my mind about this bit!DSCF0034

Stage twelve: Using the back of a teaspoon add a little blob of white icing to the base of the head … and stick the head on the body of each snowman.

Stage thirteen: If you have enough icing left give the snowmen a contrasting bobble hat.

DSCF0038
meet the motley meringue-snowmen crew

Ah! Memories … the meringue-snowman army on the move …. now I only need to find some small children to eat them 🙂

Hope you’ve enjoyed seeing these little fellas come to ‘life’ …

Do any of you make special sweet-treats for your family  at Christmas?

Do share – you know I love to hear from you

Anyone For Cake? How to….

Well! What a weekend. The first Looe Literary Festival was a tremendous success! Plenty of people turned out and took themselves down to this pretty Cornish town on the sea. PLUS it was extra interesting being ‘out of season’. There was a different vibe – and this weekend it was definitely a Literary vibe!

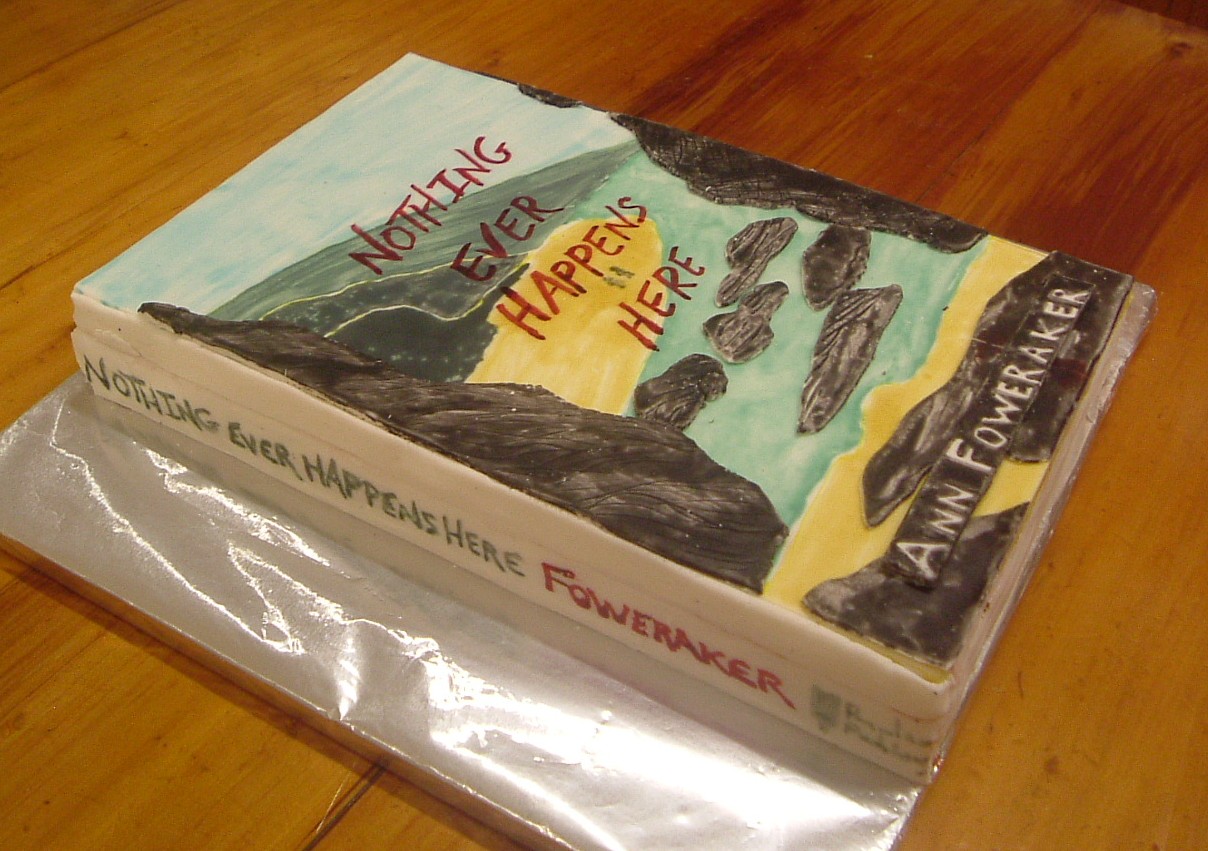
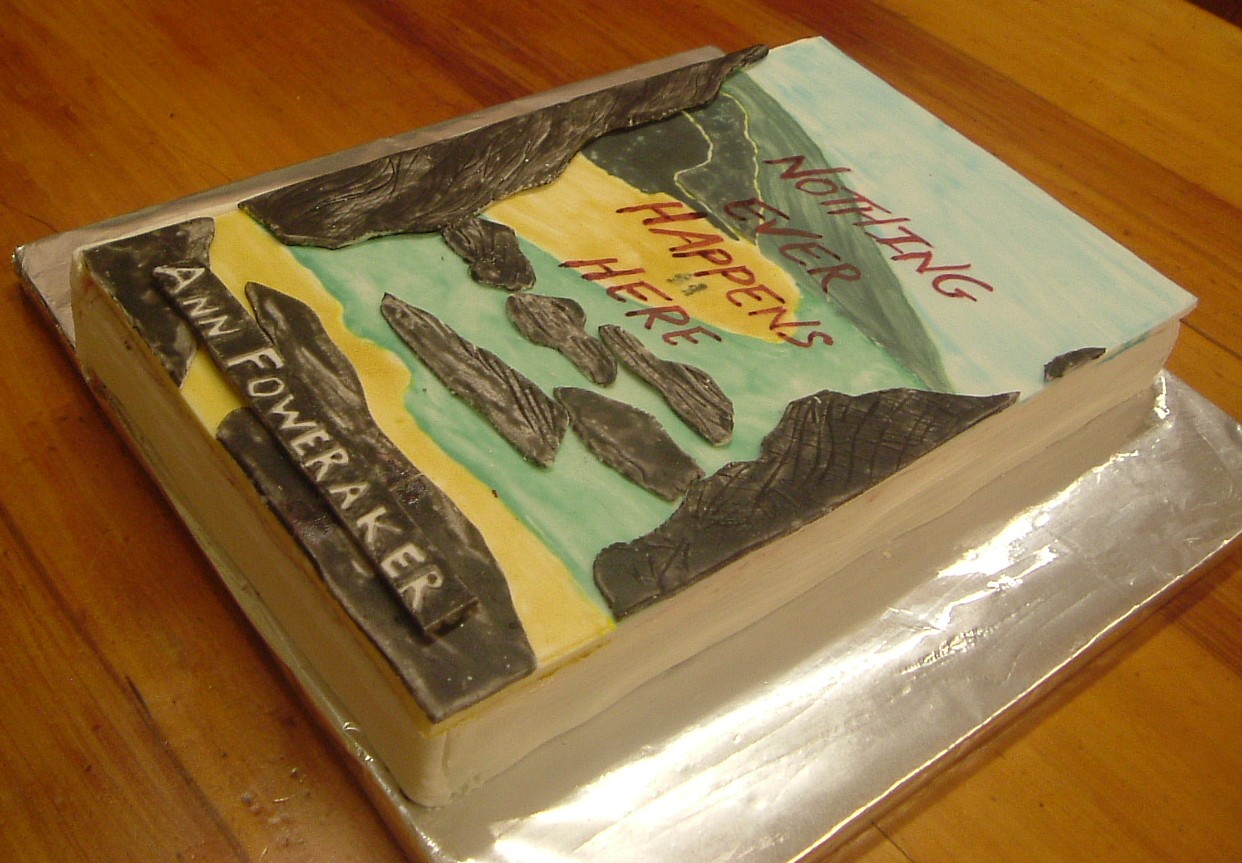
I was delighted to have my very own one hour Author Event slot arranged for me in The Old Boathouse Cafe, on the quay-side facing the river just before it emerges into the sea. My audience had a few extras, a small free draw AND CAKE. DSCF7593

I propped the cake up on my book stand – and, to my surprise, it wasn’t until I went to cut it that some people realised it was a cake!

So I’m going to give you a ‘how I made it’ here 🙂  and I hope you like it as much as others enjoyed eating it!

DSCF7564
cooked cake

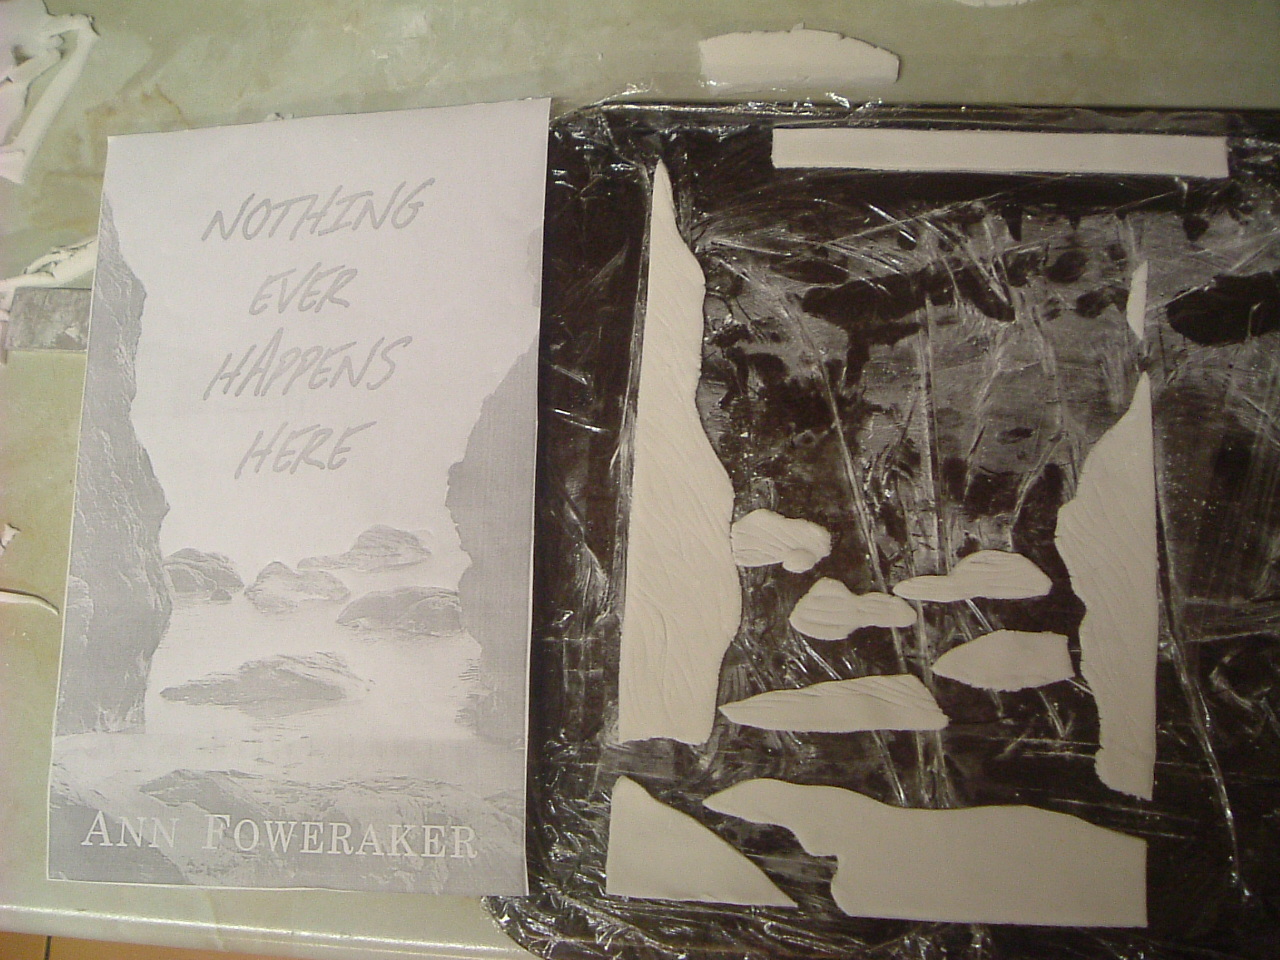
First I printed off a large picture of the book cover and used this as my template, it meant I needed to cook a cake 12″ by (about) 8″. I happen to have a nice cake tin that allows you to vary its size by inserting two interlocking dividers, with the largest at 12″ x 12″ reducing in size down to 1″ x 1″ (Though you’d probably not use it for that!) You can also make 4 cakes at once, each 6″ square. Anyway – I created the right size cake tin size and made a Victoria sandwich mix that I had calculated would fill it. (in this case cracked the 7 eggs into a jug and weighed the total, then used the exact same weight for the flour, sugar and butter) I dolloped about half of this mixture into the tin, then added 250g melted plain chocolate beating well as it was added to the other half of the mixture, then dolloped this in between the  plain mix, finishing it with a swirling motion to smooth it out then baked it at 180 degrees until cooked (about 35 mins) I wrapped it well and froze the cake.

Now to the decorations. First I mixed about half a teaspoon of gum-tragacanth into about 150g ready-made roll-out icing (Regal-Ice) This means the paste will harden. I rolled it out and carefully cut the rectangle out – placing it on a tray covered with a sheet of cling-film dusted with cornflour, covered lightly, to prevent dust, with greaseproof paper.

I re-rolled the remainder and by resting the paper sheet on top and using a cocktail stick to press on the line, marked out the shapes of all the dark rocks in the picture. DSCF7566DSCF7568

I removed the paper and using the cocktail stick drew lines on the rocks to give them texture. I also cut a long narrow rectangle to put the author name on later. All these I also placed on a tray as before and set them all to dry in a warm place.

When these were all dry I mixed food colouring to make the colours I expected to need. I marked out with a pale food-colour pen, the lines for the layers of cliffs in the distance, the sand and the sea. Then I painted these in with the food colours giving the larger areas a water wash before applying the colour as you do for water colours, but otherwise it was a bit like painting by numbers 😉 DSCF7583DSCF7586


The rocks were given a dark wash so that the textures still showed through; all this was left to dry. When the ‘paint’ was dry I assembled the pieces and hand-painted the title with a red food colour.

I cut the top of the defrosted cake and trimmed it to the perfect size then turned it upside down onto a cake-board with a little icing spread on it to prevent it slipping. I rolled out another 200g of Regal Ice and cut 4 pieces long enough to cover all the edges then rolled the rest very thinly and covered the top and sides with this thin layer, held in place by a brushing of heated-up jam. DSCF7585

Three out of the four strips were textured to look like pages, the fourth I hand painted to look like the spine of the book.

NOW! The assembly, The cover was stuck on with icing, as were all the edges… and lo! the book should have been finished. Unfortunately I forgot the extra thickness of the cover when I cut the spine…. and had to add a bit to fill in the gap!! So now you know what to look out for if you do the same .. and I will know for next time too 🙂 DSCF7594 Crop

All in all it may have made my author slot a little different … if you were there – do tell… if you were unable to come .. well I hope to get out and about more next year – maybe to a festival near you! DSCF7604 crop

As always I love to hear your thoughts – do leave a comment 🙂


Some things are better put off until tomorrow

DSCF7557This blog was the one I meant to write last week … but it didn’t get written as home events took over.. that blog started with watching the first of the new series of  ‘Trust me, I’m a Doctor’ on BBC 2  (not to be confused with Trust me, I’m THE Dr’ as in Dr Who)
This is the second series and I quite enjoy these programmes as I nearly always learn something I didn’t know – and as I try to keep up-to-date with things on the nutritional front I do spend a lot of my time saying to the TV, ‘yes, about time too’, as popular nutrition catches up with what has been going on in science for quite a while.  The programme is headed-up by Michael Mosley (of the ‘5/2 fast diet’) drawn from his previous programmes and ‘fast exercise’ – ditto)

I say I enjoy them.. I do, that is, apart from its ‘bitty’ approach where the team investigate about 4 different lines of scientific health issues at the same time (meaning that we start with one idea – move on to the next and the next .. and then pop back to see how the first is going along , than catch up with the second etc. etc.) At least they do not do the exhaustive re-cap each time… but it is annoying when it really doesn’t have to be. I want to say that I am sure we can cope with quarter of an hour on one health issue at a time… followed by the other three … and I’m sure that if we are watching this type of pr0gramme we will wait through the one that may not be immediately relevant to our own situation to learn something on the way.  (OK .. rant over)

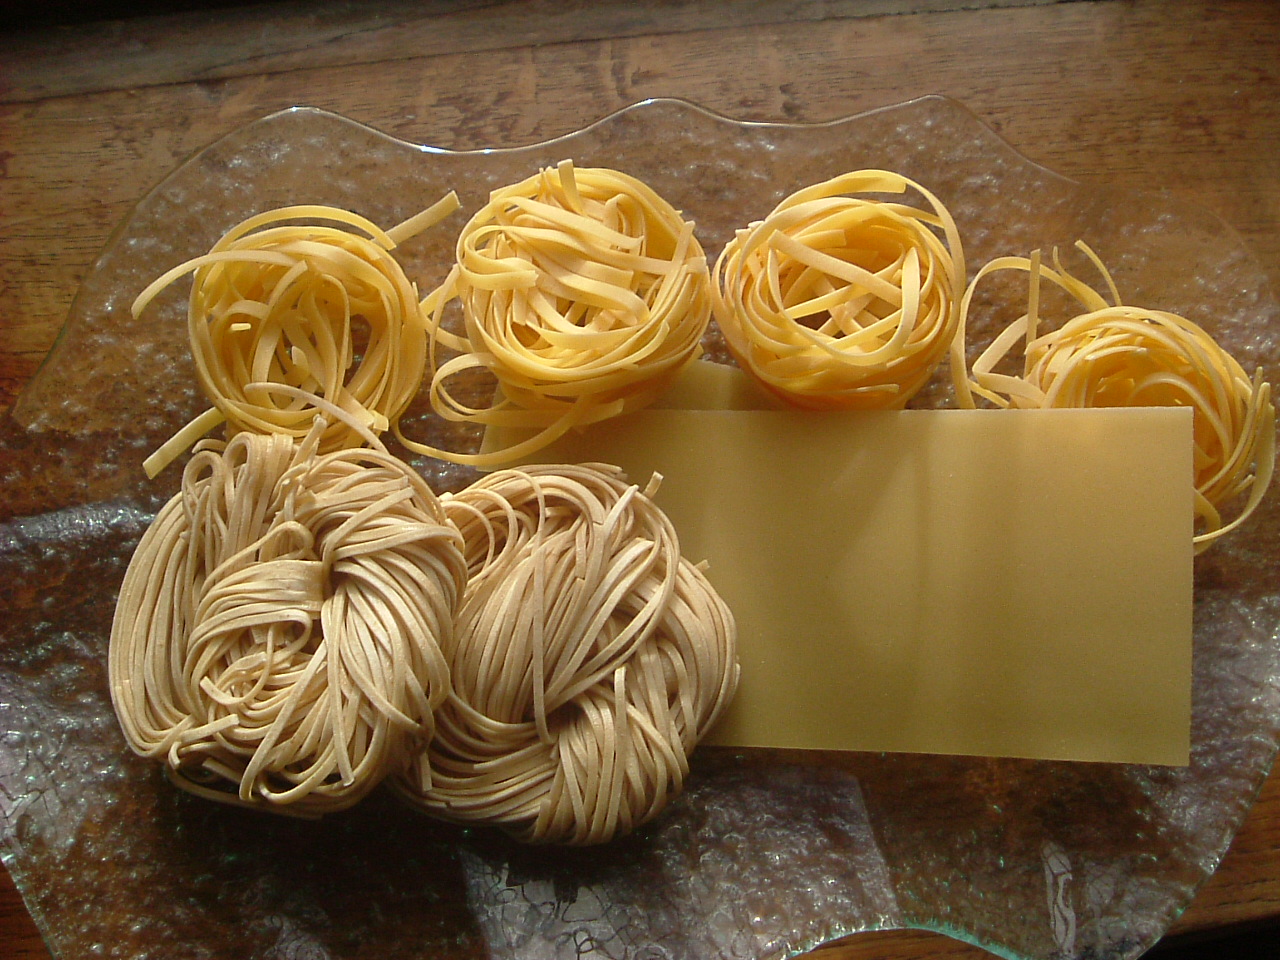
Now you may know, if you’ve been following this blog for a long time, that I managed to lose quite a bit of weight by doing weights exercises, designed by one of my sons, for less than fifteen minutes a day, while continuing to eat in a low carb (not no carb) way(as I had done for years before menopause caused weight-gain)  If I eat pasta, bread,rice or potatoes I eat a limited amount – and I always go for the ‘brown’ wholegrain versions as this gives better nutrition, more fibre and uses more energy to digest.

The nutritional scientist on ‘Trust Me…’ carried out a small on screen test of just 10 people. She knew what she was expecting with the first two trials in her experiment – but she’d also thrown in a third variation she’d not tested before.

Eat pasta and very soon you’ll have an insulin spike in your blood. Now this is natural as pasta is a carbohydrate and that is only a simple digestive step away from being a sugar… and to deal with sugar your body pumps out insulin. Fine so far… only problem is that this spike is followed by a dip in that the insulin is running around your body looking for the sugar to deal with (even after its finished with the stuff you ate). This makes you feel hungry again; gives you the ‘munchies’. It is far better for you if you can keep you insulin stable and low, not such a spike, less of a dip. Keeping your insulin levels steady is key to managing your weight and your long-term health.

The experiment: #1, eat hot freshly cooked pasta – wait –  measure insulin in blood. #2 eat cooked and then cooled pasta – wait – measure insulin in blood #3 eat cooked, cooled and kept until the next day and reheated pasta – wait – measure insulin in blood.

Results: #1 – high insulin spike #2 lower insulin level (but who wants to eat cold pasta anyway?) #3 EVEN lower insulin levels! – and that surprised even the tester. When Michael pointed out that 10 people were not much of a statistical sample, she agreed, but then added … but it was ALL 10 of them!

For the scientific details of the how and why, watch the programme  – on iPlayer for 2 more weeks here: Trust me I’m a Doctor s2 – 1:

or for those of you abroad or reading this blog later-on – on youtube here:  https://www.youtube.com/watch?v=_r9WfXtDOHA

Only problem is – when I do pasta it is usually because I am running out of time and need a fast carb to complete a meal!

However, maybe, I’ll get my act together early enough to cook, cool and reheat my pasta, as, you see … some things ARE better put off until tomorrow 🙂   

What’s your take on Pasta? Would you eat re-heated pasta if it was better for you?

What is your favourite pasta based meal?

Look forward to hearing from you

Having a Jammy time …

DSCF7517The house is feeling empty; having been jam-full for the past five weeks. It has been a joy, this big old house and garden likes to be full of young people, from the very young (grandson #3 at 17 months) through his brothers (4 & 6) – right up to their Mum and Dad – all over from Malaysia, plus two other sons of ours, and a girlfriend, then after the ‘Malaysian’ contingent left, my second cousin and boyfriend (from Australia) .. it’s been great … and busy!

And now it is quiet and the soft-fruit needs picking and the jam stocks need replenishing.

It is blackcurrant time and ours have produced a good quantity. Most of this will go into the freezer – having been carefully ‘picked over’ to remove bits of stalk, so that jam making through the year will be easier. After all, who wants to be making jam when the sun is shining? It is also useful when you want a bit of extra flavour to sharpen up an apple crumble or similar, to know you can just pull a handful from the bag in the freezer and throw them into the mix knowing they are ready to cook with.

A new comment on my ‘recipes’ on the drop-down (above) made me think I ought to put my MW recipe for Blackcurrant jam into a blog as well as just on the recipes. If you are a regular reader you may have realised by now that I use my microwave for a lot of REAL cooking – and especially for jam as I find it faster, much less of a bother (no standing over steamy pot stirring to prevent burning or sticking) and less messy – easy cleaning of bowl as there is nothing burnt on.

My MW blackcurrant recipe has proved to be very popular – in fact Google Analytics shows me that over the last week alone 89 people came to view my microwave recipe for Blackcurrant jam (and 20 the MW Apricot jam one) and, judging by the average time spent on the page, many of them chose this recipe over other recipes available on the net.
So here goes:

My microwave Blackcurrant Jam recipe (makes 5lbs)

2lbs blackcurrants (picked over to remove stalks – if using frozen, make sure they are fully defrosted overnight, defrosting by MW seems to make the skins tougher
3 dessert-spoons water
3lbs sugar

1, Place blackcurrants and water in large* Pyrex or similarly heat proof microwave safe bowl, covered, 10 mins on high power to soften fruit and release pectin. (*large enough to hold at least twice the amount of fruit you are putting in it – mine holds 6 litres)
2, Add sugar and stir in well.
3, Lid off, bring up to the boil again in MW on high – about 6 mins.
4, Stir well and put back into MW to Simmer for 8 mins ( Simmer or med > low power)
5, Stir well, and put back into MW to simmer for 4 mins and check for set (place a teaspoon of jam mix on a cold plate – pop back in fridge – will show a set if the jam skin forms wrinkles and feels thick when finger is pushed though it when cool)
6, Into well washed jars pour about 1 cm (half an inch) of boiling water, place in microwave on full power for 3 – 4 mins until the water boils in the jars. Take care and tip them out well and stand to evaporate the last bit of water while you re-heat the jam mix
7, If a set is demonstrated by your test – return jam mix to microwave and heat until bubbles appear then remove from microwave and ladle into hot jars. (if no set then simmer for another 3 mins and retest, continue until a set is demonstrated)
8, Cover with clear jam-covers as per instructions with the packet, and label.
9, Enjoy!

DSCF7538DSCF7544


DSCF7542


This recipe makes a very intensely favoured Blackcurrant jam … which we also use to flavour our home-made yoghurt, just by stirring in a scant teaspoonful at the table – YUM!

Are you a jam maker?

Do you like to use your microwave to make jam or is this a new idea for you?

Do share – you know I love to hear from you.

6Oh – and if you are a Facebooker – there is a draw on Pendown Publishing’s page to enter where you can win a paperback copy of The Angel Bug  – please do pop over there and enter – you just Like the page and answer the fun question – ‘What genre would your life-story be?’ to enter. Thanks

Pavlova time! My ‘fool-proof’ recipe

Lovely sun, luscious strawberries … it’s the perfect time for pavlova!

Sweet, dessert, pudding, whatever you like to call it, is the topping-off of a good meal. Carefully chosen to balance the type of meal preceding it, it can be a delight … and so very, very tempting, because one thing they nearly all have in common is a high carbohydrate content.  Still, don’t you find that  no matter how filling the main meal was, there still seems to be room for the sweet treat? (in our pudding stomach ) 🙂 And my favourite – the Pavlova – is no exception so I offer it to you again.phpG50cumAM.jpg 2

DSCF5744
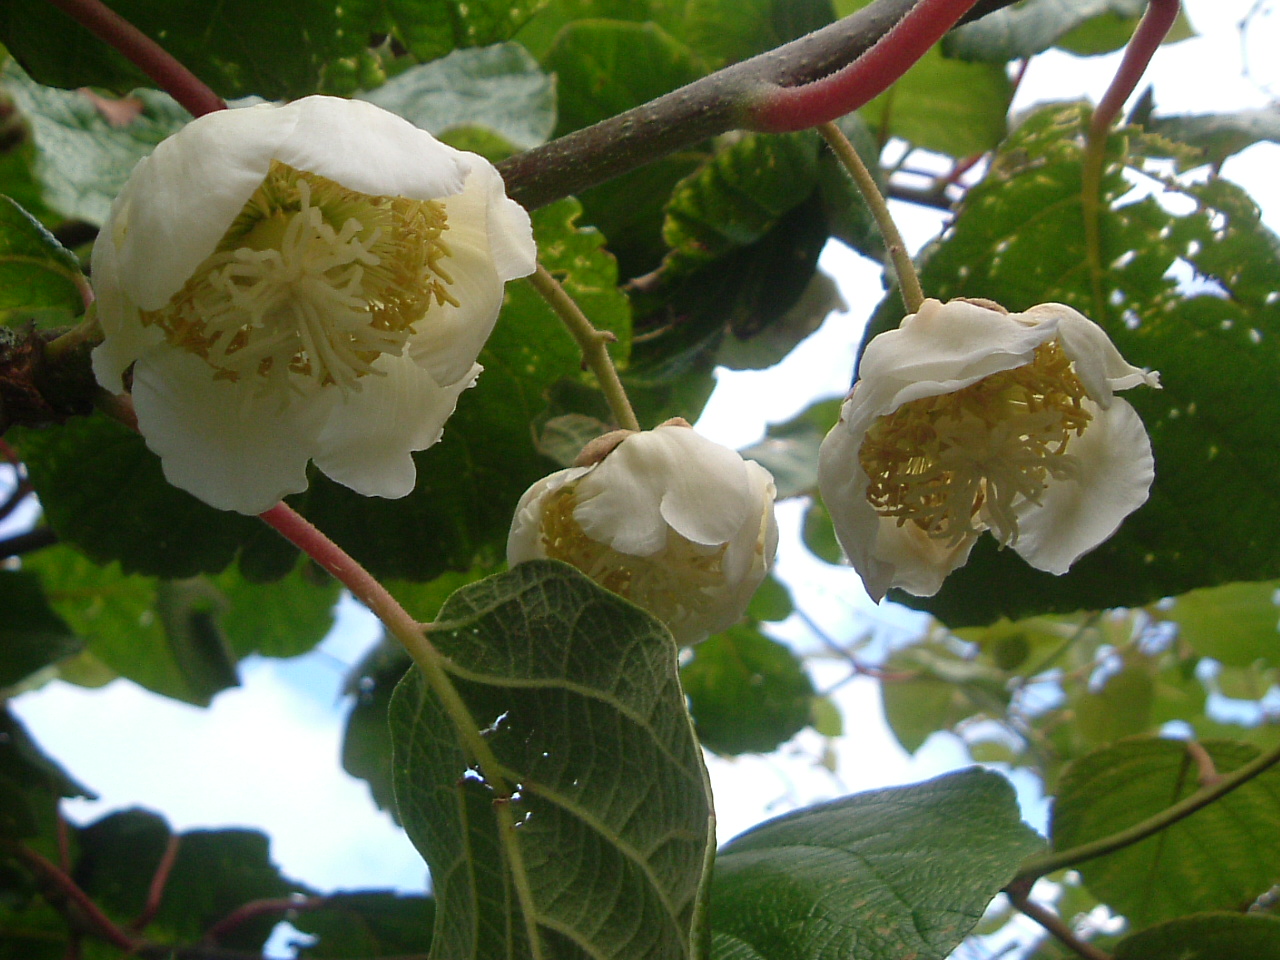
Kiwi Blossom on our plants

This one, made last week, was loaded-up with double cream, local strawberries and the very last of our own Kiwi fruit! Yes! Our own Cornwall-grown Kiwi fruit ... kept in an outdoor vermin-proof shed – 500 odd of them lined up in egg-trays – but these were the very last. There was one tray left – but the heat of the last couple of weeks had pushed most of them over the edge (too ripe). Not bad really, considering that the blossom is just opening on the kiwi plants!

It is believed that the dessert we know as the Pavlova was created in honour of the Russian ballet dancer Ann Pavlova when on a tour of New Zealand in the 1920s (though Australia hotly contests this, claiming to be the nation that hosted this culinary naming)

It is one of my favourite desserts and a long time ago I found a virtually fool-proof method of making them which has become much appreciated in the family as when I make them I usually make 3 bases at a time (well, if you have the oven on you may as well fill it up, and they do keep quite well in a sealed cake tub) and this means more than one meal-time gets this treat.  These Pavlovas are also brilliant for when you have a horde of people round – each one cutting into 8 generous servings. Best when the fruit is in season – so choose in-season brightly coloured soft or softish fruit when you can (hard fruit, like sliced apple, just doesn’t sit as well with this dessert)

Ann’s Pavlova ( or Vacherin  – not the cheese!)  

This  looks like meringue but it is really an adaptation I have made of a Vacherin – which is a type of meringue made with icing sugar (usually whisked once, but over hot water – my method seems to work just as well and be less of a bother)

Makes a 9 inch Pavlova base or 40 half mini meringues

2 egg whites
4 oz of sieved icing sugar.

Method

1, Whisk the egg whites until in stiff peaks.
2, Sieve the icing sugar and add to the whipped whites.
3, Whisk again until the mixture returns to stiff peaks
4, Either scoop into a piping bag and pipe small meringues onto a  greased baking sheet  (makes about 40 halves)
Or line the base of a 9” sandwich tin and grease the sides (or line a baking tray , draw a 9” diameter  circle, grease the sheet, spread or pipe the mixture over the area of the circle – adding a little more towards the rim).

Bake at 160 C or 140 C fan oven or Gas mk 3 (until palest fawn)

15- 20 mins for the small
1 ½  – 2 hours for Pavlova

Allow to cool gradually – I usually turn the oven off and allow it to cool before removing the pavlova bases.

To decorate use either 4 – 8 oz Cornish Clotted Cream or whip at least a quarter pint of Double Cream (taking care not to make too thick – nor runny) and spread evenly and thickly over the top.  Decorate with slices of soft / softish, fruits.

For mini-meringues. Whisk 1/4 pint double cream, place in piping tube with rosette nozzle. Pipe on one half – squeeze lightly as you stick the other half on.

Hope you find this recipe works well for you too!

Food is such an important part of our lives, it brings back memories, it can brighten our day or it can be a drudge and a scourge. How people eat and what they eat can help set scenes in novels too, can tell y0u a lot about the character without spelling it out. Take this excerpt from my novel Some Kind of Synchrony

The unexpected aroma of pizza, unmistakable in its amalgam of cooked cheese and oregano, stopped her for a moment, standing in her own hall, a rabbit poised for flight.  Then Andy appeared, filling the kitchen doorway.           

       ‘Thought I heard the door,’ he said and turned back into the kitchen.  Faith grabbed up the shopping bag and her handbag, pushed the door shut with the vigour it required, and followed him.  Two large size Pizzas stood on the table, one with the lid flopped back and a ragged wedge missing.  Andy held the remains of this piece in his fingers as he lounged against the worktop.  ‘Thought we’d have a pizza tonight – got the kids a video out too,’ he smiled, shoved the thick crust into his mouth and chewed contentedly, wiping his fingers on his jeans then folding his arms. 

I hope it’s painted a picture of Andy for you – to read the first three chapters of this book, and my others, free in PDF  just click here

What is your favourite dessert?

Are you enjoying the heat summer?

Do share – you know I love to hear from you and, fingers crossed, the glitches on the comments should be sorted out now – so i will know when you have written  🙂

Easy Wild 60s Cake decor

Ok…. so let’s fess-up… it was my 60th birthday earlier this month! Sixty seems more of a millstone milestone than fifty did. However, I saw it in in much the same way *** dancing.

DSCF7484
CLICK on any picture to get a better look at them!

And I made a cake (ok, not a surprise) but as I did so I thought that the design would suit a 60s party (as in fancy-dress based on the 1960s) as much as for a sixty-year-old. Actually, it really doesn’t matter what age – just as long as big blowsy flowers are suitable to decorate a large number-shaped cake, and these really do not have to be psychedelic colours at all… they could all be pink, or yellow, or blue, or — well you get the idea …..

And I like to share making cake decorations without using lots of fancy equipment – as many people only get to decorate a few cakes and do not want to fork-out for such stuff on a once in a blue moon basis. So here we go…

The easiest way to make a number cake is to buy or borrow a number-shapes cake tin. However, I opted to make mine easier to cover by omitting the ‘holes’ in the centres – so did not use a shaped tin.

I baked a 12 inch square chocolate and vanilla marbled sponge cake. Same recipe as Victoria sandwich (times-ed up) but longer cooking time and slightly lower temperature. The 12 inch cake took 12 eggs. For the chocolate part I melted 400g plain chocolate in the MW and beat it into half of the mixture. TIP: I always weigh-up the eggs, out of their shells, for a Victoria Sandwich… and then use exactly the same weight in caster-sugar, butter (or soft baking margarine) and self-raising flour – thereafter following the traditional recipe.60 cake plan

I also baked an 8″ round very rich fruit cake. as I knew I’d have some people that liked that … or that part of the cake would keep longer if it didn’t get eaten straight-away.60 cake rnd

I used the round cake tin to mark out the curves for the zero and for the tail on the stick of the 6. The parts were glued together onto the cake-board with apricot jam. My plan above actually shows far more waste than I had .. but none of it goes to actual waste — every-bit eagerly eaten up as a pre-taster!! Brush all over with apricot jam and cover with ready-made roll-out icing (but not ready-rolled) – you’ll need a kilo for each number. Roll out on cornflour – not icing sugar – and ‘pick-up’ supporting the icing with a rolling pin to drape and then, gently with a well-cornfloured hand, smooth the icing over the corners and curves first. Trim to fit.

Take the trimmings and work colours into them and some gum-tragacanth. (this is a specialist ingredient, I’m afraid, but my one pot has lasted me YEARS and I decorate quite a lot of cakes. Also, I’d always go with the real thing rather than the chemical substitute – the price difference isn’t huge)

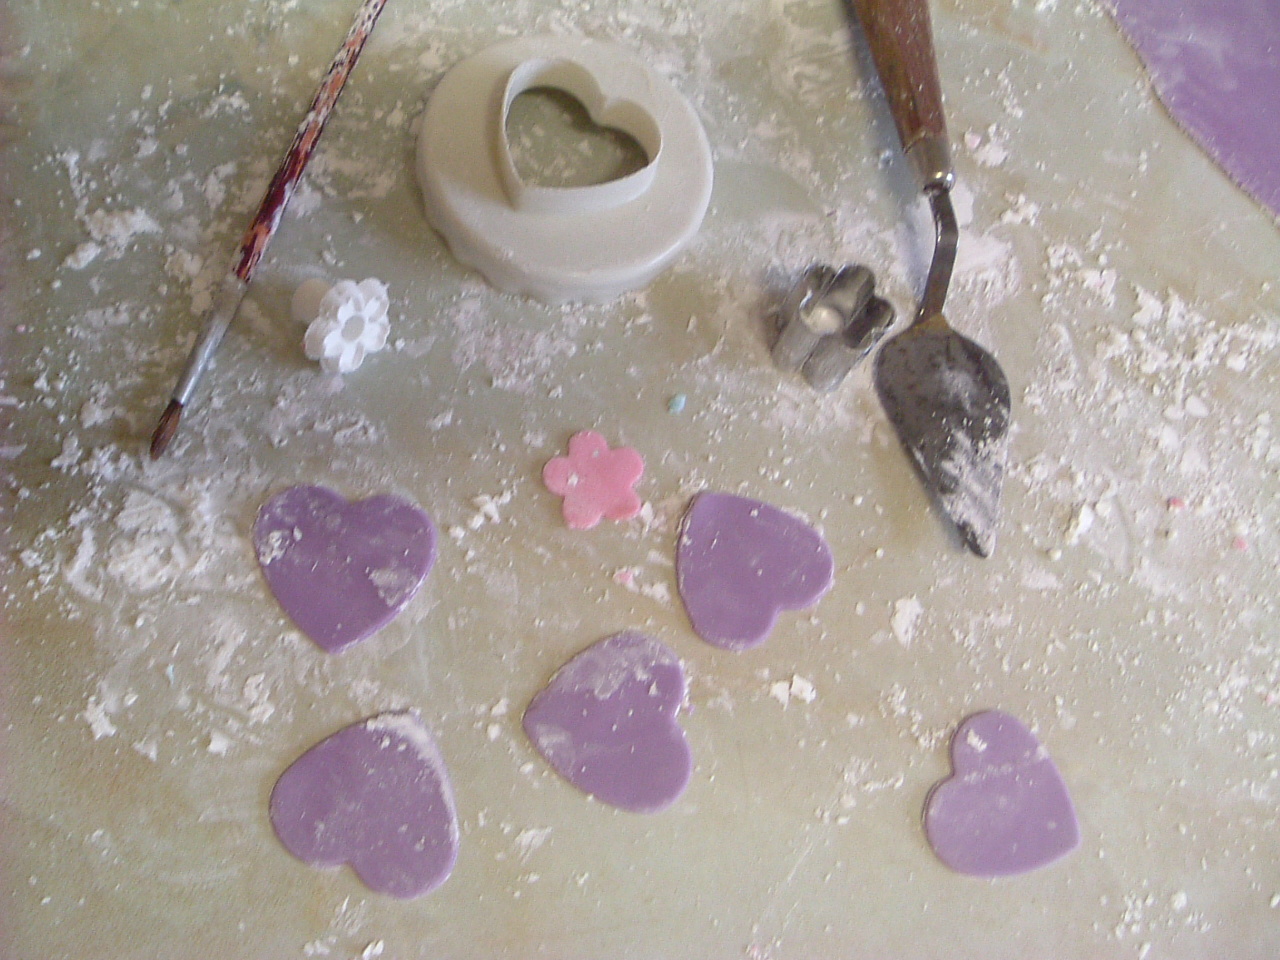
Apart from this you will need a heart shaped cutter (well worth having for all sorts of decoration). I also used a small 5 petal shape cutter (from a selection tin bought at Lakeland) and a press-cutter with similar number of petals. Now I have experimented with other ’round the house items’ and you can use a circle (cut with an apple-corer or a icing writing nozzle)  for the centre of the flowers, decorated by dotting-it with a fork.

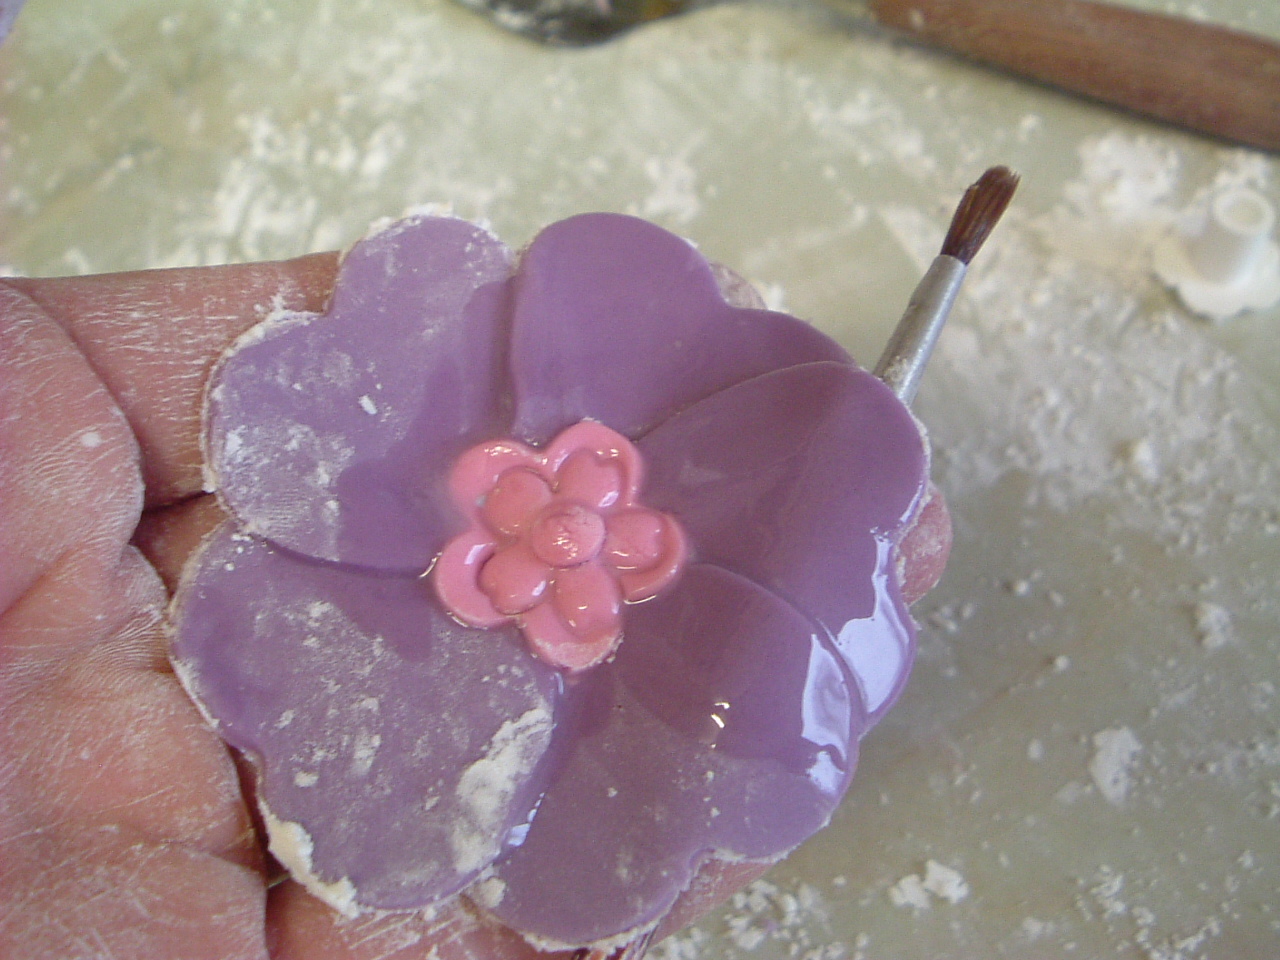
Cut five hearts. DSCF7470 Stick them together by dampening with water.DSCF7471  Cut a centre from a contrasting colour, dampen and press down firmly on the petals. DSCF7473 Support on your hand and wash off all cornflour by ‘painting’ with water.DSCF7478


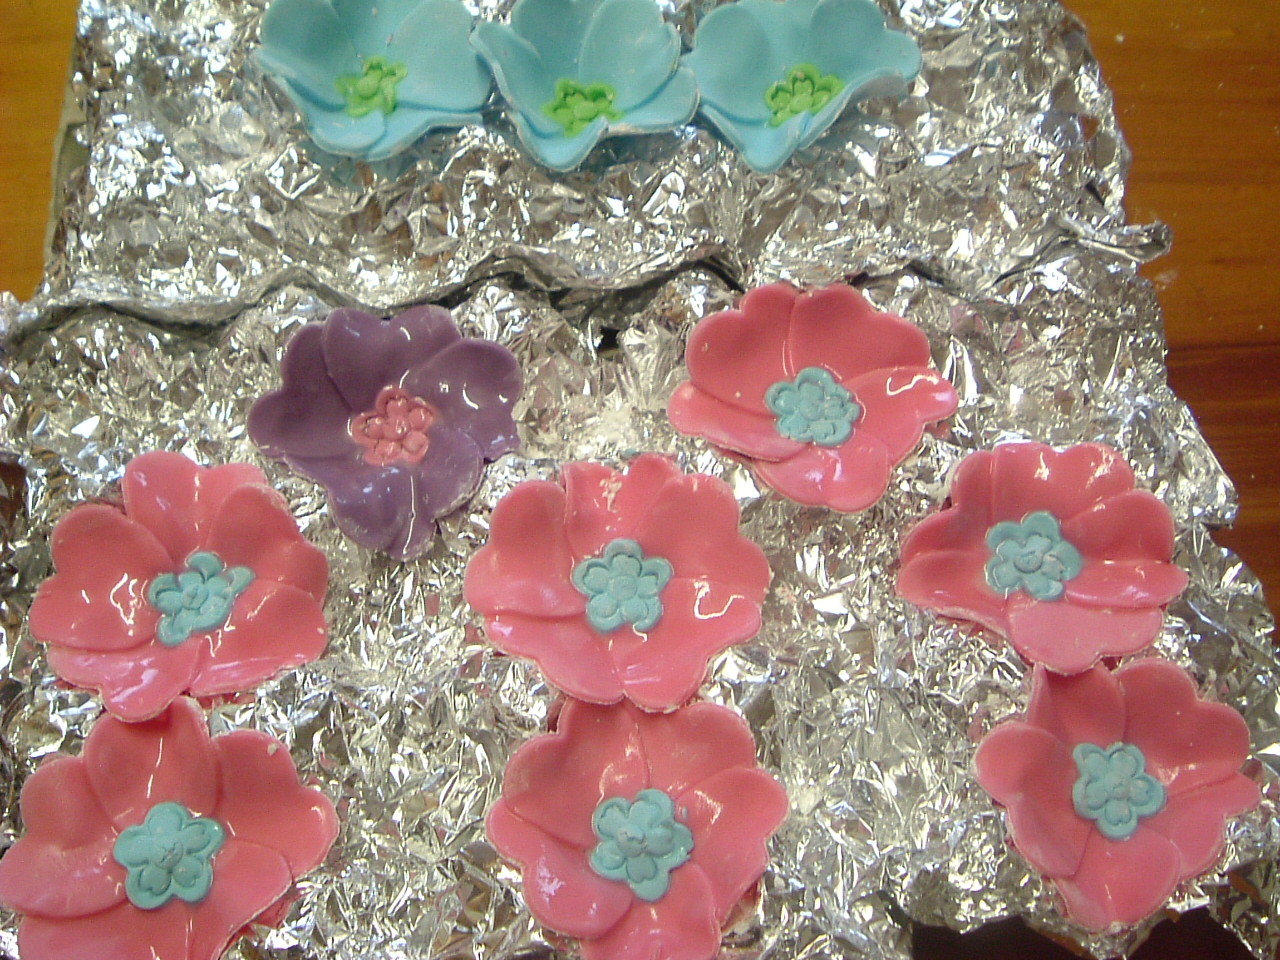
Drape into pre-prepared ‘cups’ of aluminium foil (formed over egg boxes). Leave to dry and firm-up in a warm dry place.DSCF7476

When these are dry prepare to decorate by mixing up one-egg-whites worth of royal icing. Arrange the flowers along the cake, leaving the place where the  hole would be blank. Lift each one, squeeze a blob of icing and rearrange the flower on it. DSCF7486DSCF7485 Decorate by making small leaves as done for the Christmas cake (or if you did get that spring shapes collection from Lakeland – use the small oak leaf shape) Drape the leaves between the flowers, fixed with a little icing.

Candles (if you have them) can go in the empty centres – as could a name if required. (six tall slim candles went in the centre of the 6)

Finally hearts were cut and stuck with water all round the numbers like a ribbon to finish off the cake. Hope you like the 60s effect. DSCF7488


Why do birthdays with a zero on the end feel momentous?

Which was your best (or worst) number to reach and why?


Do share, – you know I love to hear from you

IMG_0294 crop


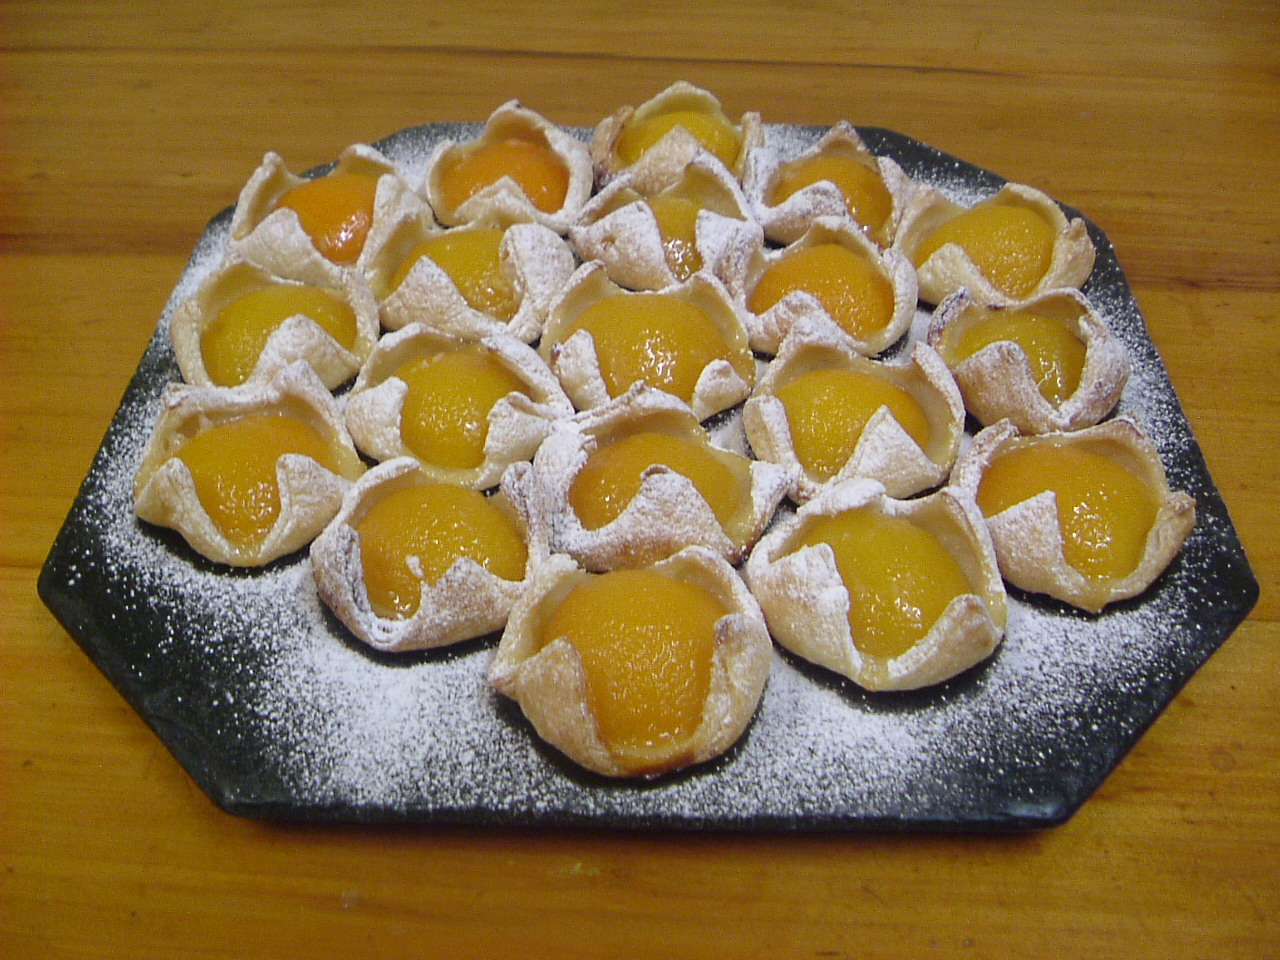
Apricot Crowns – a sweet treat cheat

OK – enough of wallowing – about time I got this blog back on track.

This week I’m going to share one of my CHEATS …. well, I always think of them as a cheat as they get more praise than they merit for the time they take AND because I use a ready-made puff pastry for them. I will admit that I almost always use a ready-made puff pastry (I have been known to make the odd rough-puff but I really do not have the time to make puff pastry properly.)

For this recipe I like to use the ALL BUTTER puff pastry (Jus-Rol). Unfortunately around here you can only get this in the ‘ready rolled’ packs *sigh*, I might not have time to make puff pastry — but, honestly, I do have the time to roll it out! Nevertheless, if I want butter (and I do!) and I buy it locally then it has to be ready rolled. (blocks are available elsewhere)

Ingredients:  1 pack ready-rolled all-butter puff pastry
1 can Apricot halves ( in juice preferably – I used Tescos this time)
1 jar Apricot Jam ( I usually use Tesco’s own or Co-Op’s own. It doesn’t have to be the best — I never use my own home-made for this.)
a dusting of icing sugar – optional.

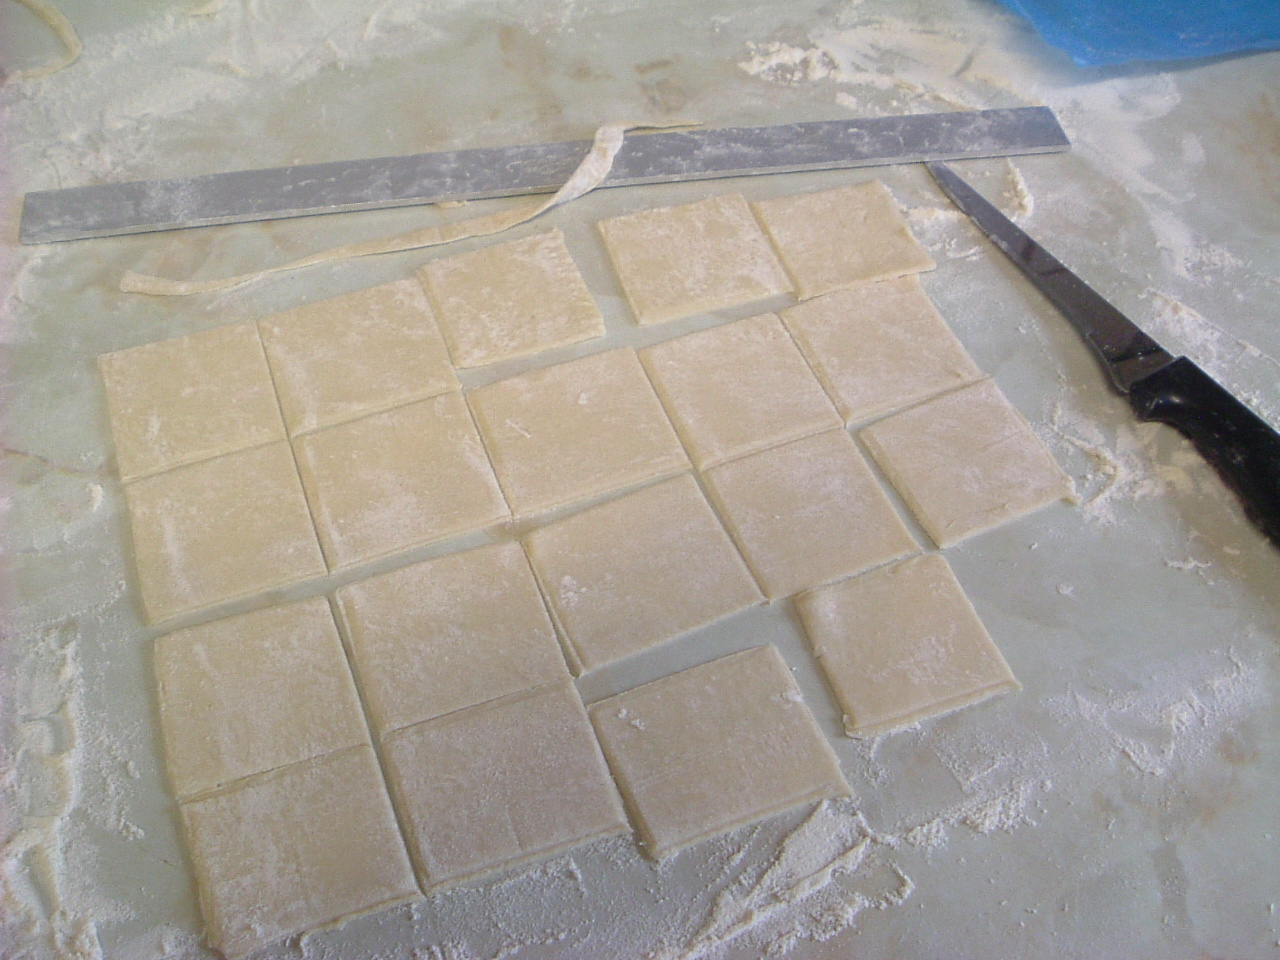
Method: Roll out the  pastry even thinnerDSCF7349 – until more than 10″ x 8″ trying to keep it a rectangle and making sure the worktop surface is well dusted with flour so it doesn’t stick

Mark out straight edges as close to the rolled edges as possible & trim with a sharp knife.

WithinDSCF7350 this mark off 2 inch squares (50mm) and cut them.

DSCF7352


Drain the apricots


and into the dip where the stone was, spoon just enough jam to fill it (do not overfill)

DSCF7353


Place the apricot on the pastry square rounded side up and pull up opposite corners

DSCF7354


then the opposite pair, stretching the pastry to make it stay.


DSCF7359


Place on a buttered baking tray

place in a hot oven (200 degrees c) DSCF7361


for about 15 minutes – until the pastry browns


NOTE: the pastry in the photo looks paler than it is / should be ( function of the flash?)
Remove and cool for a couple of minutes before sliding off onto a cooling rack.

DSCF7366


When cool arrange on dish (or slate plate) and dust with icing sugar.

(makes about 20 – depending on the apricots in the can)


This is a favourite when asked to take along ‘finger food’ desserts – they pop in the mouth very nicely and are not too sweet or messy.

What are your favourite sweet treat cheats?

What are your opinions on ready-made puff pastry v home-made?

Do you like reading recipes here on the blog?

Do share, you know I love to hear from you…..


Did you miss me? Sorry – I was decorating this cake…

yes… I missed my post date …!  What was I thinking doing?

Well I sat down ready to write and then I had one of those moments when you realise that you haven’t done something that MUST be done… and there is no other time to do it than right NOW!

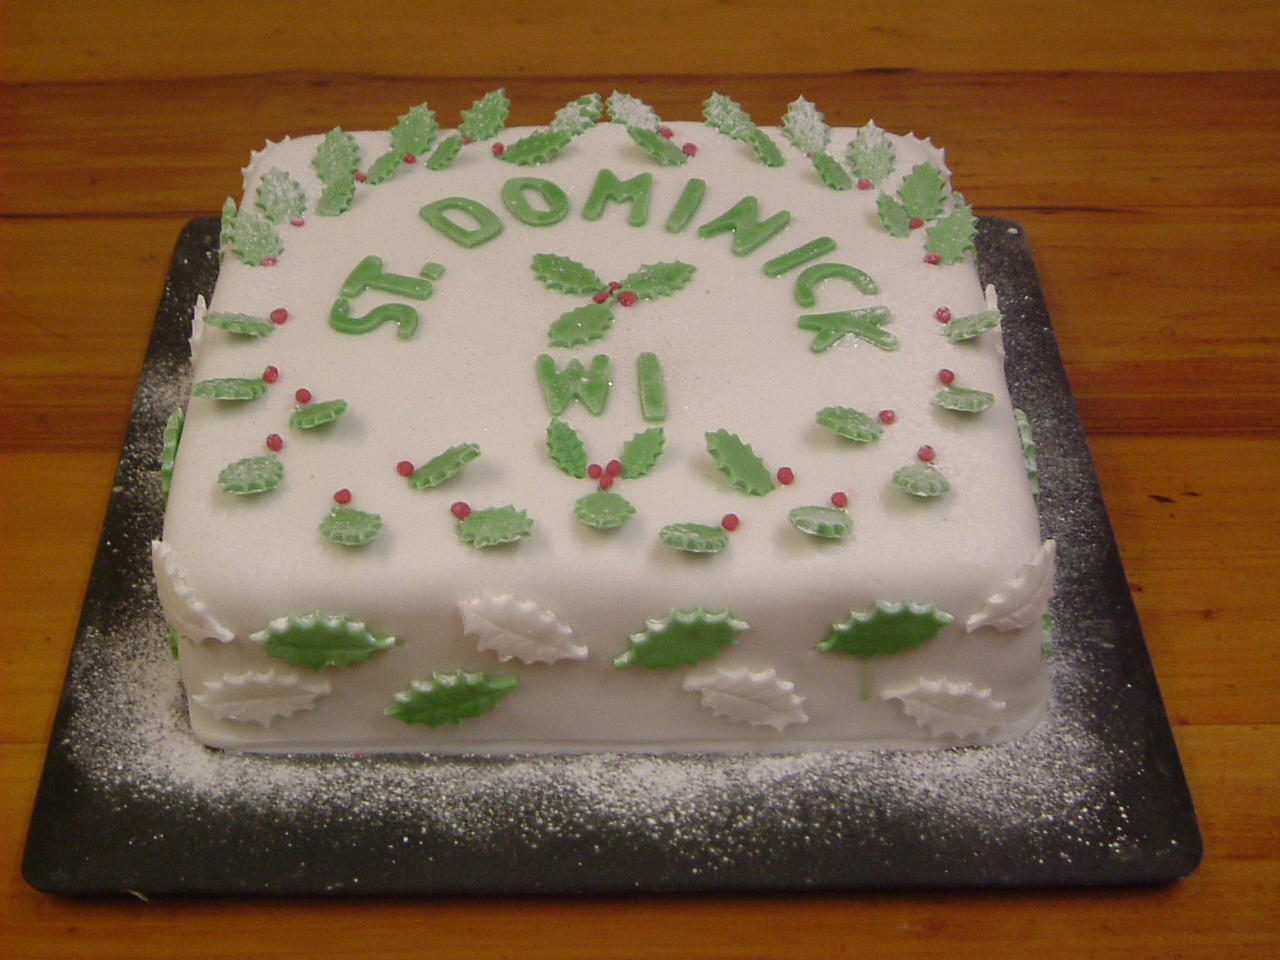
Yes – it was Tuesday evening and the WI Christmas cake had to be ready for Wednesday evening… and I was out at the market all Wednesday morning and out again with my OH in the afternoon. Could I do both, blog and decorate the cake? I looked at the time, thought I might but that the cake must come first (sorry) and set about the decorations. DSCF7339 wi cake

It’s not as if I had totally forgotten about this, a few days previously I had made and dried a lot of icing holly leaves and the lettering for the decorations, but there was still the covering, the other decoration bits and the assembly to do.  It all had to be last minute as it was to be a sponge cake ( by request) , and I’d made this and frozen it a week before. I had even remembered in the morning to take it out of the freezer to thaw gently … just somewhere during the day I had forgotten it again (worrying, or what?).

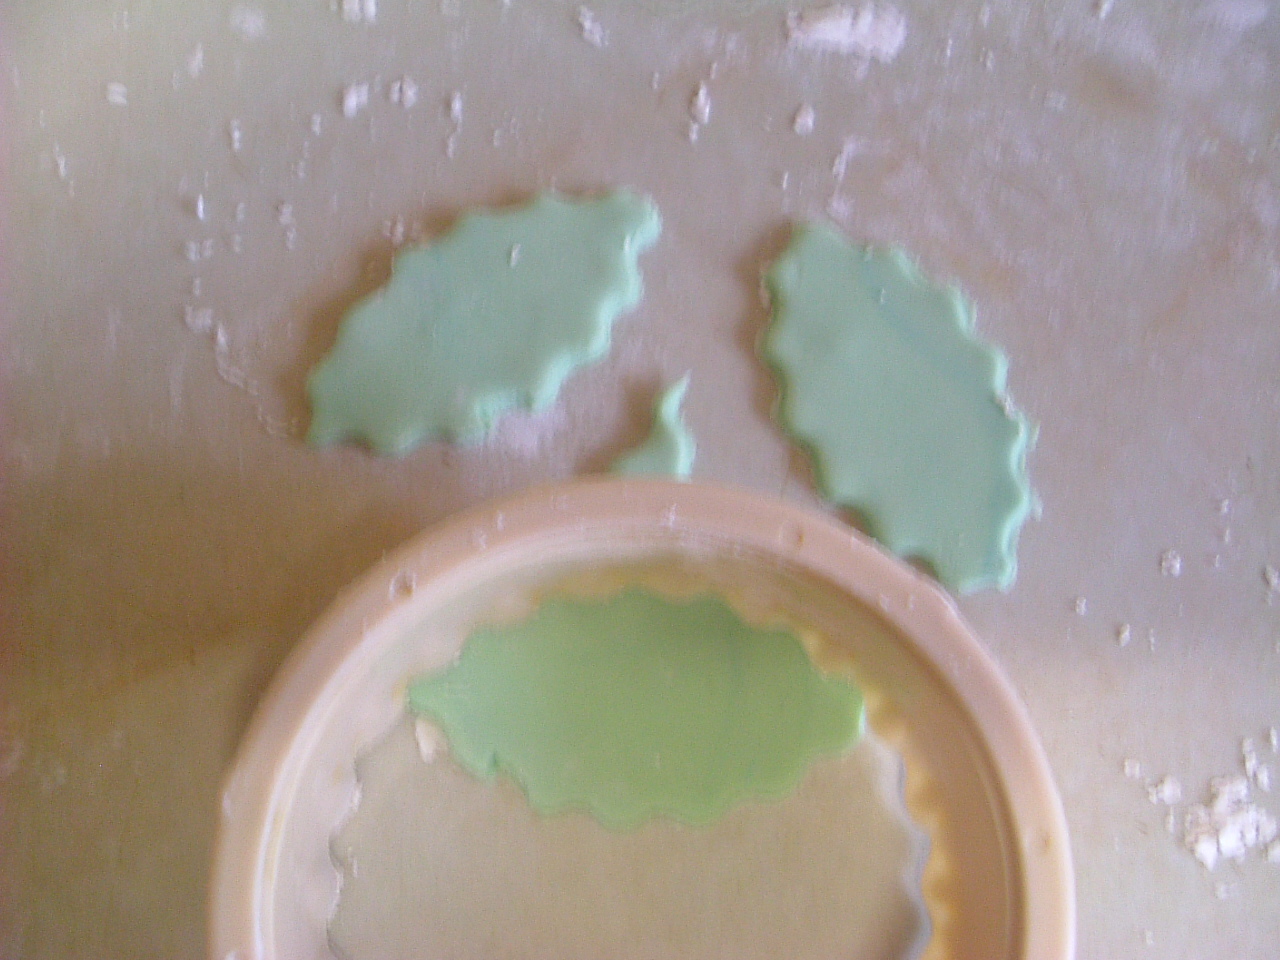
Now I do have a range of holly cutters, but you do not have to have specialist cutters to create this effect – should you wish to – substituting Happy Christmas for the name of our WI, of course 🙂  Holly leaves of three different sizes can be made using just one ‘sweet’ pastry cutter ( the ones with the wavy edges)

Colour some ready-to-roll icing green (I find Regal Ice the best for taste and texture) This is easiest done using powder cake colours rather than the liquid ones – but you can use the liquid if you can’t get hold of the powder – you may just have to knead in a little corn flour to take away the stickiness.

If you have gum tragacanth then blend in a sprinkling to ensure a hard set to your icing leaves. They will firm up as they dry anyway – but gum tragacanth will make sure they are hard.

Roll out your coloured icing on a work surface dusted with corn-flour. This is MUCH better than icing sugar! Use a medium cutter and cut as many circles as you can fit out of the icing. Depending on the size of the holly leaves you want, cut 4, 3 or 2 holly leaves from each circle by cutting on an edge. See photos.

DSCF7343DSCF7344DSCF7346

These can then be enhanced using the back of a knife to mark the rib and veins of the leaf. DSCF7347

Cover a baking sheet with a piece of cling film and dust with corn flour, place the leaves on this and leave somewhere warm to dry. If you want wavy leaves fold or screw up paper of aluminium foil and lay the cling film over this and the leaves on top – leaves will lie on the uneven surface and mould themselves to the shape – resulting in wavy leaves when dry. DSCF7348

If you’ve never used roll-out icing before may I say just four things. 1, Use the base of the cake as the top, and brush warm apricot jam all over the surface. 2, Roll out icing on corn flour – and make sure it isn’t too thin, then lift the sheet using a rolling pin as support and drape over the cake, overlapping the cake out to the edge of the board. 3, Gently press / smooth the corners first (if square cake) then ease the sides down without creases. (If round cake make sure the icing it evenly ‘draped’ around the cake and ease down from the top all round, to form smooth sides.) 4, ‘Polish’ with palm of hand dusted in corn flour, gently and smoothly, then trim off excess.

To attach the holly leaves and letters just moisten the back with water (I use a dedicated paintbrush) and press lightly down – if on side of the cake hold for a moment to make sure it doesn’t slide. To create the 3 dimension effect of holly leaves sticking up, make a small hole in the icing with a cocktail stick, moisten the end section of a piece of holly and press it in, smoothing the icing over the ‘stem’.DSCF7338 wi cake holly crop[

Many, many years a go I bought a set of letters for cutting out of icing – a most excellent and ever useful buy!DSCF7357  However, if you do not have these you can roll out the icing into a long thin sausage ( all that DSCF7358plasticine or play-dough rolling skills come in handy) and use this to ‘write’ a script Merry Christmas on to the top of the cake. Lie it on dry, then when in the right place lift, moisten top of cake and place down in the right place.

Lastly, some white holly leaves cut from the trimmings, mark them up and use to fill in between the green, and a few red berries, made by colouring some of those trimmings red, roll into a thin sausage, cut a small piece, roll on palm of hand and add with the dampened brush tip onto the right place.

So there it is – our WI Christmas cake… and, perhaps, an idea for you – simply done with little in the way of special decoration equipment. Alas, the blog didn’t get written that night … and so this is the new blog post – hope you liked it!

Have you made and decorated your Christmas cake yet?? (Mine is made… but not yet decorated)

Do you find yourself ‘double-booking’ your time?

Do share – you know I love to hear from you

error

Enjoyed this blog? Please share :)